How to upload file using Multer in Express.js
Share
Welcome dear friend. I am sure you have wondered how to upload files in your Node.js application. And, during your search, you may have come across multer, formidable, Busboy, and the rest. I have decided to create an article for you on how to use multer.
File Upload
File upload is about uploading your files, especially on a server. As a developer, you might need to save images on the disk storage of your server or, due to storage limit and other limitations, you may want to consider Cloud Delivery Networks such as Cloudinary or S3 Bucket.
Let’s Begin!
Once upon a time, I was battling with file upload. It’s time I contribute to easing the stress.
1) Install express and multer, and create your server file:
npm install express multer
const express = require("express");
const app = express();

const PORT = process.env.PORT || 3000;
app.listen(PORT, ()=>{
  console.log("app running on port: "+PORT)
})
2) Create a folder called public and, inside the root of this project, create a file called index.html and a folder called fileuploads(where we will be storing our uploaded files). Finally, create a folder called middlewares where we will create our multer middleware and add our multer file called multerUpload.js:
app.js
public/
   index.html
   fileuploads
middlewares/
   multerUpload.js
3) Create a form in your index.html or front-end. Make sure you set enctype=“multipart/form-data” as an attribute to your form:
<!DOCTYPE html>
<html lang="en">
<head>
  <meta charset="UTF-8">
  <meta name="viewport" content="width=device-width, initial-scale=1.0">
  <title>Document</title>
</head>
<body>
  This is the webpage
  <p></p>
  <!-- make sure to put enctype="multipart/form-data" -->
  <form enctype="multipart/form-data" action="/upload" method="POST">
    <label>Select file</label><br/>
    <input type="file" name="filename"/>
    <br/>
    <p></p>
   <button type="submit">Submit</button>
  </form>
</body>
</html>
4) Configure your Multer.
For Multer documentation, visit: multer npm documentation.
Open the multerUpload.js file inside your middlewares folder, and configure multer in the following way:
const multer = require("multer");

// configure multer for your server folder
var storage = multer.diskStorage({
    destination: (req, file, cb) =>{

        //ensure that this folder already exists in your project directory
        cb(null, "public/fileuploads");
    },
    filename: (req, file, cb)=>{
        cb(null, file.originalname)
    }
});

//Filter the image type
const imageFileFilter = (req, file, cb) =>{
    if(!file.originalname.match(/\.(jpg|jpeg|png|gif)$/)) { //If the file uploaded is not any of this file type

    // If error in file type, then attacch this error to the request header
        req.fileValidationError = "You can upload only image files";
        return cb(null,false, req.fileValidationError);
    }
    cb(null, true)
};

//Here we configure what our storage and filefilter will be, which is the storage and imageFileFilter we created above
exports.upload = multer({storage: storage, fileFilter: imageFileFilter})
Multer basically needs the
NOTE:
req.fileValidationError = “You can upload only image files”;
This is so that we attach the error to the request header in case the file is not an image. And finally, we export the middleware so we can use it anywhere in our code.
To know how to export and import in NodeJS, simply check my shot on How to import and export in nodejs.
5) Import Multer middleware into your server file(index.js) and apply it to your upload route so that your final code is:
const express = require("express");
const app = express();
const {upload} = require("./middlewares/multerUpload")
app.use(express.static("public"));
//Ensure that the filename below is the same as the file name in the form
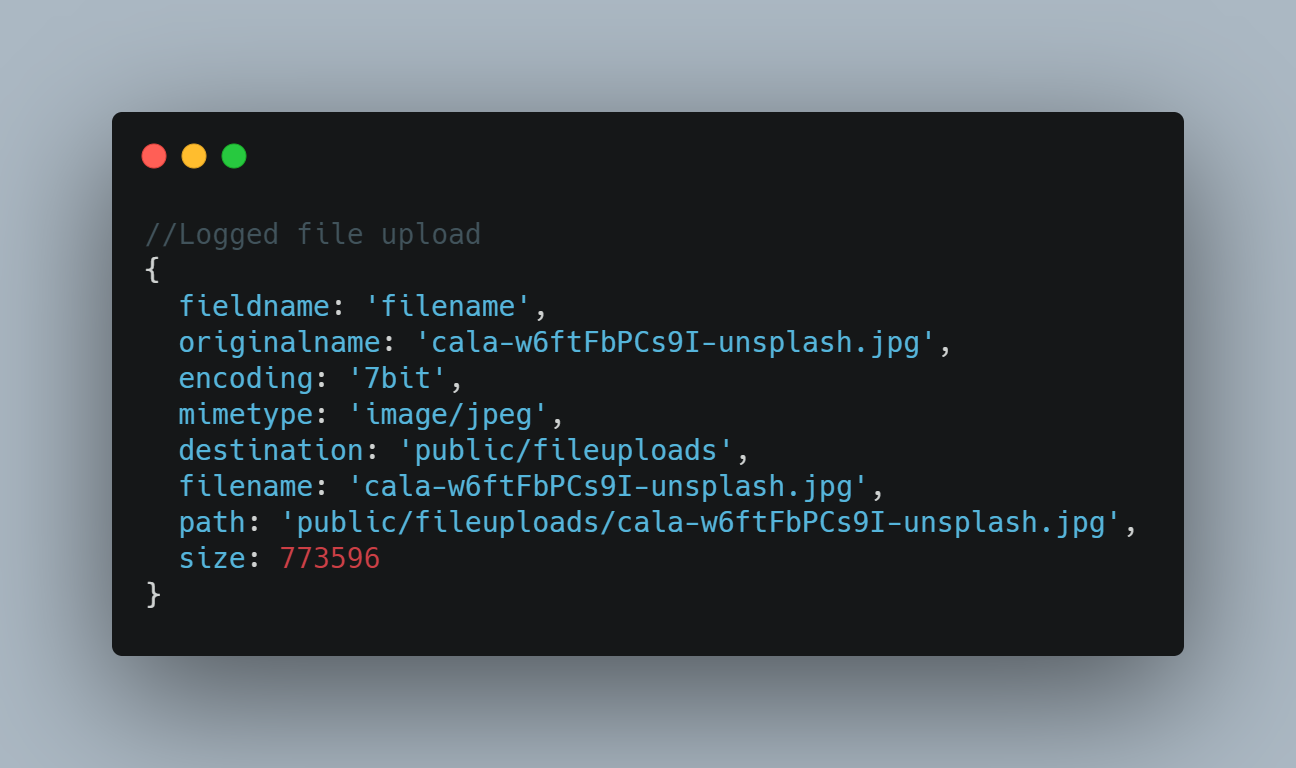
app.post("/upload", upload.single("filename"), (req, res)=>{
console.log(req.file) //Here your file is logged to the console!
res.end("FIle Upload successfull: Here it is!: "+JSON.stringify(req.file))
})
const PORT = process.env.PORT || 3000;
app.listen(PORT, ()=>{
console.log("app running on port: "+PORT)
})
Here, we imported our Multer middleware and we used it in our route. We used the single() method because we only want to be uploading one at a time, but we could have used array()if we wanted to upload more than one.
Make sure the label we pass to the
single()is the same as the name of the field name of your file in your form.
<input type="file" name="filename"/>
upload.single("filename")
That is all there is, friend!
Run Your Code
node index.js
Conclusion
We have seen that, with Multer. we can upload files to our server and do what we want with the file during upload.
If you have questions, please let me know. Here is the full code: source code.
PS: if you want another shot on how to upload and view these files in your browser using mongodb, please let me know via Twitter. Thanks for your time.
