How to create a "Select All" checkbox
Introduction
The “select all” checkbox is a User Interface element present in some Web applications that allows you to select multiple items or data fields at once so you can perform the same action on the selected items.
The HTML markup
The markup for your layout can vary depending on the project. In this article, we’ll use HTML tables:
<table>
    <thead>
        <tr>
            <th>
                <label
                       for="select_all_checkboxes"

                       >Select all checkboxes
                </label>
				<input type="checkbox" id="select_all_checkboxes" />
			</th>
			<th>Date</th>
			<th>Approved</th>
			<th>Post Title</th>
			<th>Name</th>
			<th>Email</th>
			<th>Read Comment</th>
		</tr>
	</thead>

    <tbody>
        <!-- Code truncated to save space -->
	</tbody>
</table>
<input
       id="multiple_deletion"
       type="submit"

       value="Delete"
/>
If you look at the for attribute of each label, you’ll realize that they are unique for each input (check the HTML for the complete code).
Though this HTML is static, when you implement this feature with a server-side programming language, the value of the for attribute should be dynamically generated for each label.
The CSS styling
There is nothing advanced about the CSS code – it’s straight to the point:
table {
	border-collapse: collapse;
	margin: 1.2em auto;
	width: 90%;
	word-wrap: break-word;
}

thead {
	background-color: #1560bd;
	color: #ffffff;
	text-align: left;
}

/* Code truncated to save space */
Check the GitHub repo for the complete CSS code.
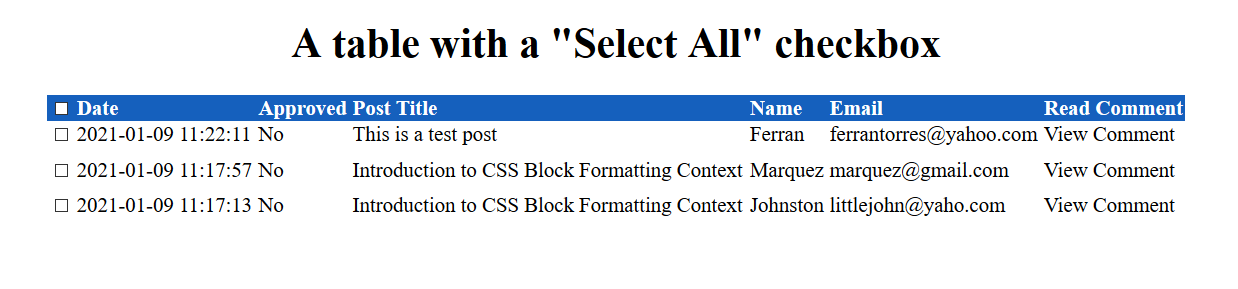
When you load the HTML with the CSS in your Web browser, you’ll get an output similar to the image below.
This page has no interactivity, let’s fix that with JavaScript.
The JavaScript
The logic behind the “select all” checkbox is discussed below.
- When the user clicks and select the “select all” checkbox, the script should select all checkboxes in the table.
- When the user deselects the “select all” checkbox, the script should deselect all checkboxes in the table.
On the initial loading of the script, there is a check to confirm that the submit input exists on the page before we do anything else. If you take a look at the HTML, the submit input will have an HTML ID value of multiple_deletion, this is used in the check.
if (document.getElementById("multiple_deletion")) {
    // Other code upcoming
}
Variables are also used to keep track of the checked checkboxes. However, before anything else, the value of this variable is initiated to zero, and the button used to perform multiple deletions after clicking on the “select all” checkbox is hidden.
if (document.getElementById("multiple_deletion")) {
    let checked = 0;
	let multiple_deletion = document.getElementById("multiple_deletion");
	multiple_deletion.style.display = "none";
}
When the user clicks on the “select all” check box, the following algorithm is performed:
-
Loop through the checkboxes using a
forloop -
If the “select all” checkbox is indeed checked
-
Highlight all table rows
-
Change the
checkedattribute of each checkbox totrue -
Increment the value of the checked variable using the post-increment operator
-
-
When the user deselects the “select all” box
-
Remove all the table highlights
-
Set the
checkedattribute of all checkboxes tofalse -
Decrement the value of the checked variable using post-decrement operator
-
-
If the checked variable is greater than
1-
Show the button for multiple deletion
-
Else, hide the button for multiple deletion
-
This algorithm is encapsulated in the code below:
if (document.getElementById("multiple_deletion")) {

    // Previous code remain the same.

	let select_all_checkboxes = document.getElementById("select_all_checkboxes");
	let delete_checkbox = document.getElementsByClassName("delete_checkbox");

	select_all_checkboxes.addEventListener("click", function () {
	    for (let i = 0; i < delete_checkbox.length; i++) {
	        if (select_all_checkboxes.checked === true) {
	            highlightAllTableRows();
	            delete_checkbox[i].checked = true;
	            checked++;
			} else {
	            removeTableRowsHighlight();
	            delete_checkbox[i].checked = false;
	            checked--;
			}

	        if (checked > 0) {
	            multiple_deletion.style.display = "block";
	        } else {
	            multiple_deletion.style.display = "none";
			}
		}
	});
}
You should know that I deleted some comments from the code above (and in the code before it) to keep it uncluttered.
You can check the selectallcheckboxes.js file for the full commented code.
Before we proceed,we need to clarify two things implemented from the algorithm above, these are the functions highlightAllTableRows() and removeTableRowsHighlight(). Both of the names of these functions describe what they do.
The highlightAllTableRows() does the following:
- Loops through the table rows
- If the table row is not the first row that contains the “select all” checkbox and does not contain the
highlightedCSS class:- Add the
highlightedCSS class
- Add the
These steps are shown in the code below:
// Place this function outside the 'if' statement
function highlightAllTableRows() {
	let row = document.getElementsByClassName("table-row");
	for (let i = 0; i < row.length; i++) {
		if (!row[i].classList.contains("highlighted") && i !== 0) {
			row[i].classList.add("highlighted");
		}
	}
}
The function removeTableRowsHighlight() does the opposite – this is shown in the code below:
// Place this function outside the 'if' statement
function removeTableRowsHighlight() {
	let row = document.getElementsByClassName("table-row");
	for (let i = 0; i < row.length; i++) {
		if (row[i].classList.contains("highlighted") && i !== 0) {
			row[i].classList.remove("highlighted");
		}
	}
}
Moving forward, each row in the table has its associated checkbox. These checkboxes have a class attribute of delete_checkbox and are selected using the DOM method document.getElementsByClassNameHTMLCollection
During this process, an
-
Highlight the table row
-
Increment the
checkedvariable by1 -
“Delete” checkbox when the user unchecks
-
Set the checked attribute of the “select all” checkbox to
false -
Remove the row highlight
-
Decrement the checked variable by
1
-
-
Guard against negative values of the checked variable.
-
If the checked variable is greater than
1-
Show the button for multiple deletion
-
Else, hide the button for multiple deletion
-
In code:
// Place this code inside the 'if' statement
for (let i = 0; i < delete_checkbox.length; i++) {
    delete_checkbox[i].addEventListener("click", function () {
        if (delete_checkbox[i].checked === true) {
            highlightTableRow();
            checked += 1;
        } else if (delete_checkbox[i].checked === false) {
            select_all_checkboxes.checked = false;
            removeTableRowHighlight();
            checked -= 1;
        }

        if (checked < 0) {
            checked = 1;
        }

        if (checked > 0) {
            multiple_deletion.style.display = "block";
        } else {
            multiple_deletion.style.display = "none";
        }
    });
}
We are almost done, but you need to know about two additional things included in the code snippet above, the functions highlightTableRow() and removeTableRowHighlight(). The functions are responsible for highlighting (and removing highlighting) from a specific table row that the user has clicked on.
The function highlightTableRow() performs a loop on the entire table. During this process, an event listener is attached to each row that listens for a click event and makes sure that the input in that table row is checked before the highlight is applied:
function highlightTableRow() {
	let table_row = document.getElementsByClassName("table-row");
	for (let i = 0; i < table_row.length; i++) {
		let row = table_row[i];
		if (i !== 0) {
			row.addEventListener("click", function () {
				if (row.children[0].childNodes[3].checked === true) {
					row.classList.add("highlighted");
				}
			});
		}
	}
}
You might find the following line a bit strange:
if (row.children[0].childNodes[3].checked === true) {}
This line targets the input checkbox that 3 levels deep in each table row. Take a look at the following HTML and count the number of elements in the tr element:
<tr>

    <!-- level 1 -->
    <td>

        <!-- level 2 -->
        <label></label>

        <!-- level 3 -->
        <input/>

	</td>
</tr>
The removeTableRowHighlight() function does the opposite, it removes the row highlight:
function removeTableRowHighlight() {
	let table_row = document.getElementsByClassName("table-row");
	for (let i = 0; i < table_row.length; i++) {
		let row = table_row[i];
		if (i !== 0) {
			row.addEventListener("click", function () {
				if (
					!row.children[0].childNodes[3].checked === true &&
					row.classList.contains("highlighted")
				) {
					row.classList.remove("highlighted");
				}
			});
		}
	}
}
Code
Conclusion
In this article, you learned how to implement a “Select All” checkbox. I encourage you to work on and improve the code.
