How to drag and drop using React
A commonly used feature when building a web application is the drag and drop feature that makes web pages look more interactive.
There are many libraries which can be used to achieve this drag-and-drop feature. However, in this guide, we are not going to make use of any library; instead, we will achieve functionality using built-in features only.
Code
Let’s start by creating a simple application in which to implement the drag and drop functionality.
See the code below:
import React, { Component } from 'react';
import './App.css';

export default class AppDragDropDemo extends Component {
    state = {
        tasks: [
            {name:"Hit the gym",category:"todo", bgcolor: "#FFB695"},
            {name:"Get breakfast", category:"todo", bgcolor:"#96D1CD"},
          ]
    }

    render() {
        var tasks = {
            todo: [],
            done: []
        }

        this.state.tasks.forEach ((t) => {
            tasks[t.category].push(
                <div key={t.name}
                    className="draggable"
                    style = {{backgroundColor: t.bgcolor}}
                >
                    {t.name}
                </div>
            );
        });

        return (
            <div className="container-drag">
                <h2 className="header">DRAG & DROP DEMO</h2>
                <div className="todo">
                    <span className="task-header">To-Do List</span>
                    {tasks.todo}
                </div>
                <div className="droppable">
                     <span className="task-header">Tasks Done</span>
                     {tasks.done}
                </div>


            </div>
        );
    }
}
Executing the code above displays two columns:
- The To-Do List
- The column of Tasks Done
Our job is to make the tasks in the “To-Do List” drag-able; this way, they can be moved to the “Tasks Done” column.
Note: The
className=”draggable”is set to thedivwhich renders the tasks in the “To-Do List” that are to be dragged. TheclassName=”droppable”is also set to thedivwhich renders the “Tasks Done” column.
Now, we can start working on how to implement the drag and drop functionality.
Drag element implementation
In order to create a draggable element, we need to pass a draggable prop to its div.
In the code below you should now be able to drag the tasks in the “To-Do List” across the screen.
import React, { Component } from 'react';
import './App.css';

export default class AppDragDropDemo extends Component {
    state = {
        tasks: [
            {name:"Hit the gym",category:"todo", bgcolor: "#FFB695"},
            {name:"Get breakfast", category:"todo", bgcolor:"#96D1CD"},
          ]
    }

    render() {
        var tasks = {
            todo: [],
            done: []
        }

        this.state.tasks.forEach ((t) => {
            tasks[t.category].push(
                <div key={t.name}
                    className="draggable"
                    draggable
                    style = {{backgroundColor: t.bgcolor}}
                >
                    {t.name}
                </div>
            );
        });

        return (
            <div className="container-drag">
                <h2 className="header">DRAG & DROP DEMO</h2>
                <div className="todo">
                    <span className="task-header">To-Do List</span>
                    {tasks.todo}
                </div>
                <div className="droppable">
                     <span className="task-header">Tasks Done</span>
                     {tasks.done}
                </div>


            </div>
        );
    }
}For a task to be dropped into the “Tasks Done” column, we first need to implement the DragOver event passed to the column’s div (Line 2).
<div className="droppable"onDragOver={(ev)=>this.onDragOver(ev)}><span className="task-header">Tasks Done</span>{tasks.complete}</div>
We will be implementing the class method DragOver which will take the event, ev as a parameter.
onDragOver = (ev) => {ev.preventDefault();}
Next, we need to fire an event whenever a task is dragged; for this, we need to implement the onDragStart method. We will be implementing a class method and, again, onDragStart will take the event (ev)and the task name (t.name) as parameters.
onDragStart = (ev, id) => {console.log('dragstart:',id);ev.dataTransfer.setData("id", id);}this.state.tasks.forEach ((t) => {tasks[t.category].push(<div key={t.name}onDragStart = {(e) => this.onDragStart(e, t.name)}draggableclassName="draggable"style = {{backgroundColor: t.bgcolor}}>{t.name}</div>);});
We are printing the name of the task that is dragged ( Line 1 ) and setting its name to the id field ( Line 2 )in the onDragStart method using setData.
Let’s have a look at the output when we compile the code we have so far:
import React, { Component } from 'react';
import './App.css';

export default class AppDragDropDemo extends Component {
    state = {
        tasks: [
            {name:"Hit the gym",category:"todo", bgcolor: "#FFB695"},
            {name:"Get breakfast", category:"todo", bgcolor:"#96D1CD"},
          ]
    }

    onDragOver = (ev) => {
        ev.preventDefault();
    }

    onDragStart = (ev, id) => {
        console.log('dragstart:',id);
        ev.dataTransfer.setData("id", id);
    }

    render() {
        var tasks = {
            todo: [],
            done: []
        }


    this.state.tasks.forEach ((t) => {
        tasks[t.category].push(
            <div key={t.name}
                onDragStart = {(e) => this.onDragStart(e, t.name)}
                draggable
                className="draggable"
                style = {{backgroundColor: t.bgcolor}}
                >
                {t.name}
            </div>
        );
    });

        return (
            <div className="container-drag">
                <h2 className="header">DRAG & DROP DEMO</h2>
                <div className="todo">
                    <span className="task-header">To-Do List</span>
                    {tasks.todo}
                </div>
                <div className="droppable"
                    onDragOver={(ev)=>this.onDragOver(ev)}>
                    <span className="task-header">Tasks Done</span>
                    {tasks.done}
                </div>


            </div>
        );
    }
}
Now, when you begin to drag the task, the console prints the name of the task that is being dragged. This means that our event handlers are working.
Drop element implementation
Let’s move onto the implementation of the drop of an element.
To drop the task into the “Tasks Done” column, we need to implement an onDrop event handler that is passed into the column’s div. We will be implementing a class method again, onDrop, which will take the event, ev, and the new category, done, as parameters.
onDrop = (ev, cat) => {let id = ev.dataTransfer.getData("id");let tasks = this.state.tasks.filter((task) => {if (task.name == id) {task.category = cat;}return task;});this.setState({...this.state,tasks});}<div className="droppable"onDragOver={(e)=>this.onDragOver(e)}onDrop={(e)=>this.onDrop(e, "complete")}><span className="task-header">Tasks Done</span>{tasks.complete}</div>
In the onDrop method, we are fetching the task name that we initially stored in the id field using getData. We loop over the list of tasks and update the category (task.category) of the one which matches. Then, we simply update the existing state using this.setState.
Now, let’s compile the code together:
import React, { Component } from 'react';
import './App.css';
export default class AppDragDropDemo extends Component {
state = {
tasks: [
{name:"Hit the gym",category:"todo", bgcolor: "#FFB695"},
{name:"Get breakfast", category:"todo", bgcolor:"#96D1CD"},
]
}
onDragOver = (ev) => {
ev.preventDefault();
}
onDrop = (ev, cat) => {
let id = ev.dataTransfer.getData("id");
let tasks = this.state.tasks.filter((task) => {
if (task.name == id) {
task.category = cat;
}
return task;
});
this.setState({
...this.state,
tasks
});
}
onDragStart = (ev, id) => {
console.log('dragstart:',id);
ev.dataTransfer.setData("id", id);
}
render() {
var tasks = {
todo: [],
done: []
}
this.state.tasks.forEach ((t) => {
tasks[t.category].push(
<div key={t.name}
onDragStart = {(e) => this.onDragStart(e, t.name)}
draggable
className="draggable"
style = {{backgroundColor: t.bgcolor}}
>
{t.name}
</div>
);
});
return (
<div className="container-drag">
<h2 className="header">DRAG & DROP DEMO</h2>
<div className="todo">
<span className="task-header">To-Do List</span>
{tasks.todo}
</div>
<div className="droppable"
onDrop={(e)=>this.onDrop(e, "done")}
onDragOver={(ev)=>this.onDragOver(ev)}>
<span className="task-header">COMPLETED</span>
{tasks.done}
</div>
</div>
);
}
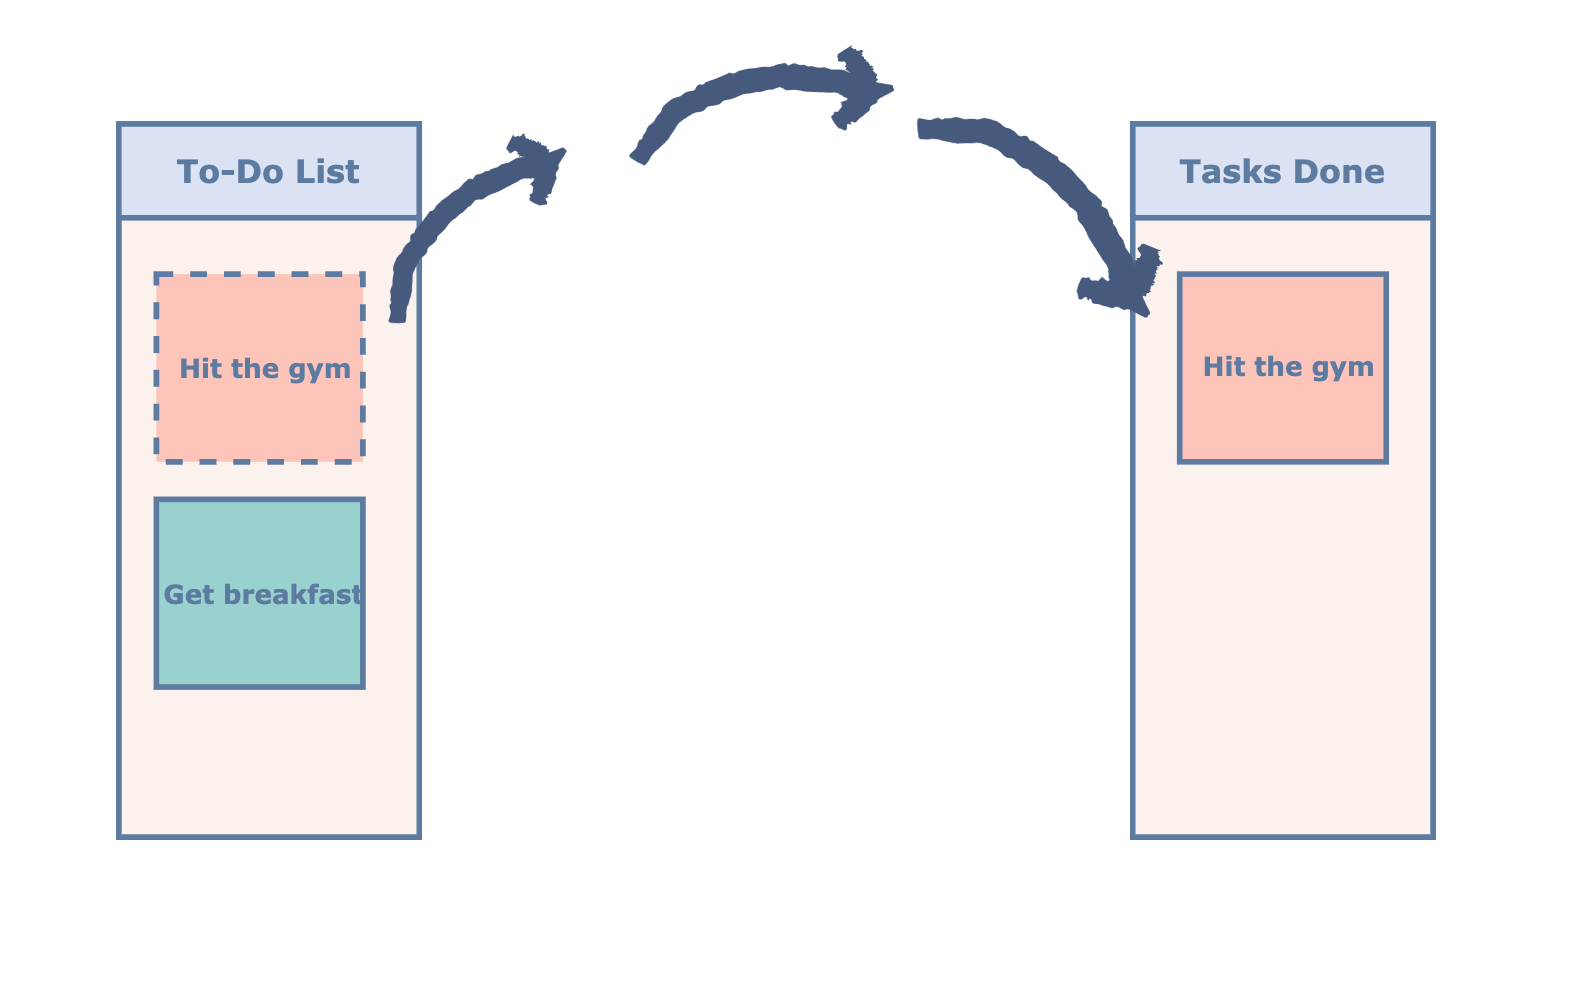
}You can see that the tasks can now be dragged and dropped from the “To-Do List” to the “Tasks Done” column.
However, what if you notice that you cannot drag a task back to the “To-Do List”?
To solve this, you just have to pass on an onDrop event handler and an onDragOver event handler to the div of the “To-Do List” column.
See the complete working code below:
import React, { Component } from 'react';
import './App.css';

export default class AppDragDropDemo extends Component {
    state = {
        tasks: [
            {name:"Hit the gym",category:"todo", bgcolor: "#FFB695"},
            {name:"Get breakfast", category:"todo", bgcolor:"#96D1CD"},
          ]
    }

    onDragOver = (ev) => {
        ev.preventDefault();
    }

    onDrop = (ev, cat) => {
       let id = ev.dataTransfer.getData("id");

       let tasks = this.state.tasks.filter((task) => {
           if (task.name == id) {
               task.category = cat;
           }
           return task;
       });

       this.setState({
           ...this.state,
           tasks
       });
    }

    onDragStart = (ev, id) => {
        console.log('dragstart:',id);
        ev.dataTransfer.setData("id", id);
    }

    render() {
        var tasks = {
            todo: [],
            done: []
        }


    this.state.tasks.forEach ((t) => {
        tasks[t.category].push(
            <div key={t.name}
                onDragStart = {(e) => this.onDragStart(e, t.name)}
                draggable
                className="draggable"
                style = {{backgroundColor: t.bgcolor}}
                >
                {t.name}
            </div>
        );
    });

        return (
            <div className="container-drag">
                <h2 className="header">DRAG & DROP DEMO</h2>
                <div className="todo"
                    onDragOver={(e)=>this.onDragOver(e)}
                    onDrop={(e)=>{this.onDrop(e, "todo")}}>
                    <span className="task-header">To-Do List</span>
                    {tasks.todo}
                </div>
                <div className="droppable"
                    onDrop={(e)=>this.onDrop(e, "done")}
                    onDragOver={(ev)=>this.onDragOver(ev)}>
                    <span className="task-header">COMPLETED</span>
                    {tasks.done}
                </div>


            </div>
        );
    }
}Free Resources
