How to use CustomPaint in Flutter
Flutter is one of the most widely used open source frameworks by Google for building natively compiled, multi-platform applications from a single codebase.
The CustomPaint class in Flutter is a widget that provides a canvas, which can be drawn on during the paint phase.
CustomPaint first asks the painter to paint on the current canvas, then asks its child, after which the ForegroundPainter begins to paint. All three are mostly expected to paint within the rectangle. To enforce painting within the bounds, consider wrapping this CustomPaint with a ClipRect widget.
With the CustomPaint widget, we have access to low-level paint calls. These let us build graphics easily.
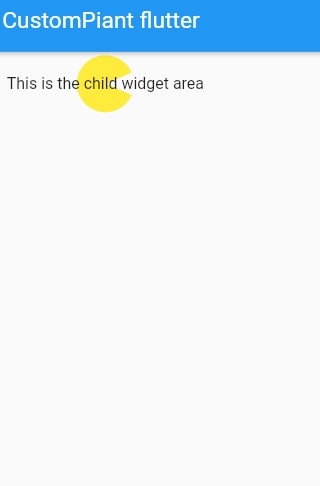
Let’s consider an example, where the Material ink ripple effect is implemented using a circle.
Usage
First, we need to add a CustomPaint() widget to our widget tree. We need to define this by giving it a size and a painter.
The MyPainter class is implemented, which is used as a painter in custom paint. MyPainter is a simple class that extends CustomPainter and implements two methods:
paint()shouldRepaint()
The shouldRepaint() method is called when the customPainter is rebuilt. You can determine the framework needed to use the previous result of paint.
The paint() method is where you get your canvas and are free to draw. We can draw the following:
- Lines
- Rectangles
- Arcs
- Paths
- Images
- Text paragraphs
The following is the code for customPainter.
class DemoPainter extends CustomPainter {@overridevoid paint(Canvas canvas, Size size) {var center = size / 2;var paint = Paint()..color = Colors.yellow;canvas.drawArc(Rect.fromCenter(center: Offset(center.width, center.height),width: 50,height: 50,),0.4,2 * 3.14 - 0.8,true,paint,);}@overridebool shouldRepaint(covariant CustomPainter oldDelegate) {throw UnimplementedError();}}class _MyHomePageState extends State<MyHomePage> {int _counter = 0;void _incrementCounter() {setState(() {_counter++;});}@overrideWidget build(BuildContext context) {return Scaffold(appBar: AppBar(title: Text(widget.title),),body: Padding(padding: const EdgeInsets.all(20.0),child: CustomPaint(child: Container(child: Text('This is the child widget area'),),painter: DemoPainter(),),),);}}
The output of the code is given as:
The complete code can be accessed by the following
