Python is the perfect language for performing tasks of varying complexity, and it even allows for writing scripts to automate processes. A script is a set of instructions that can be run on its own in order to repetitively perform certain tasks in an automatic manner. Automation can help a user in various day-to-day tasks, ranging from email scheduling to file backup and more. This eliminates the need for manually conducting the same actions again and again.
Use Python Script Automation to fetch images from NASA
12 min read
Jan 15, 2024
content
In the previous tutorial, we learned how to download images to our local machine using NASA’s API. That was cool, right?
We are going to take this one step further and learn how to send those images as attachments in email. Then we will automate that process using a task scheduler. Please note that to download the images from NASA’s API, we will use the same code from the the previous tutorial, so read through those basics before continuing here.
Today, we will cover:
- Change Google settings
- How to send today’s astronomy picture by email
- How to send a picture from an input date
- How to send a random astronomy picture
- How to send astronomy images automatically
- Wrapping up
Change Google settings#
In this tutorial, we use Google’s Gmail service and the SMTP (Simple Mail Transfer Protocol) to send emails. But Google may not allow us to do so for security reasons. So, first of all we need to change our security settings on our Google account.
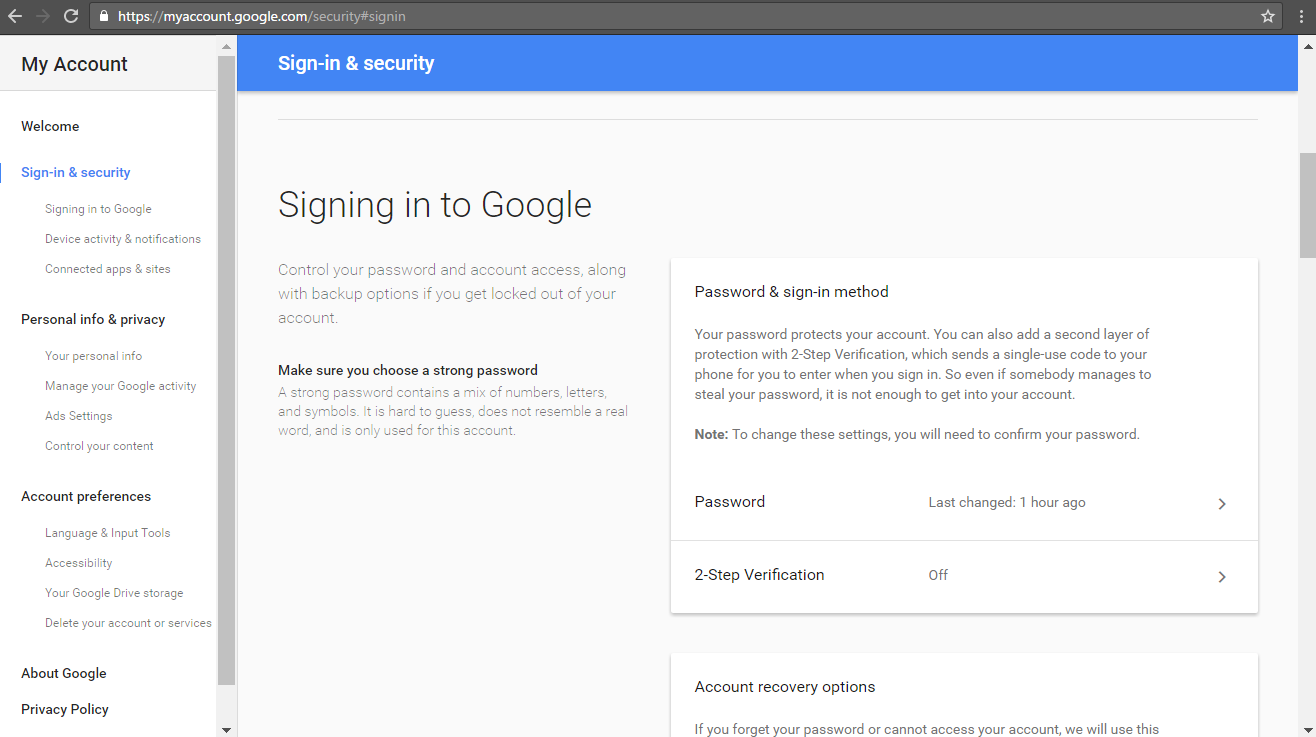
You can change these settings by logging into your Google account and then navigating to the security settings.
1. Disable the 2 step verification#
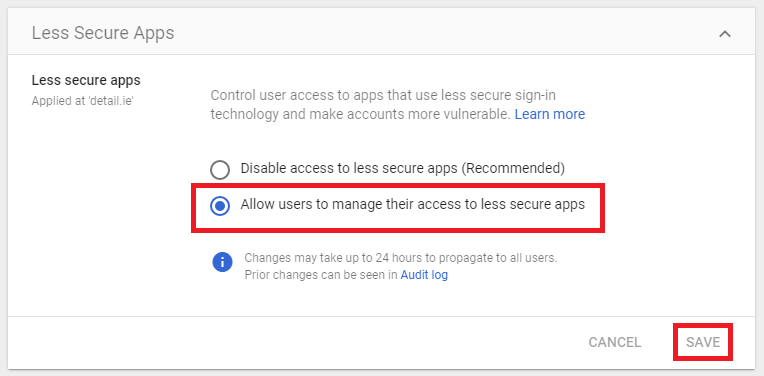
2. Allow access to less secure apps#
How to send today’s astronomy picture by email#
Our goal is to download Astronomy Picture of the Day (APOD) using the NASA API like we did in the previous tutorial. But instead of displaying it on the notebook, we are will send it to an email address. After downloading the image to our local machine, we are going to use SMTP module to send it to our email.
Let’s see how it’s done.
Step 1: Import required libraries#
#Import required libraries:import nasapyfrom datetime import datetimeimport urllib.requestimport smtplibfrom email.mime.multipart import MIMEMultipartfrom email.mime.text import MIMETextfrom email.mime.base import MIMEBasefrom email import encoders
nasapy: We use the nasapy library to access the information provided by NASA API.datetime: To get a date in a specific format, we’ll use a datetime library.urllib: The image we get from NASA API will be in a form of a URL.smtplib: We use the smtp module to create a client session object that can be used to send mail to any internet machine that listens to smtp.MIMEMultipart: Our mail content will have simple text and attachments.MIMEText: MIMEText is for text/html/plain text. If the message is in text form, we use this.MIMEBase: MIMEBase is provided primarily as a convenient base class for more specific MIME-aware subclasses.encoders: Here we import the encoders module to encode the payload or attachments while sending emails.
Step 2: Create an object of NASA class#
Here we create an object called nasa. We are using the nasapy library and our registered api key. We’ll use this object to call a method of NASA class to get the information on astronomical images.
#Initialize Nasa class by creating an object:k = "523p5hPYHGzafYGLCkqa54kKMTV2vbP0XcPxkcLm"nasa = nasapy.Nasa(key = k)
Step 3: Get date in required format#
Now to get an image for a specific date, we need to pass a date in a specific format. The required format for the date is YYYY-MM-DD. To get today’s date, we are going to use datetime.today() function.
We need to convert this tuple into a string using the function strftime(%Y-%m-%d), which convert our dates into the right format.
#Get today's date in YYYY-MM-DD format:d = datetime.today().strftime('%Y-%m-%d')
Step 4: Get information from NASA’s API#
Now that we have today’s date in the required format, we can place a request for today’s astronomical image. Here we are going to use picture_of_the_day() method to get the image data.
Note that our data is stored in apod variable.
#Get the image data:apod = nasa.picture_of_the_day(date=d, hd=True)
Step 5: File name for image files#
Now, we have to maintain a certain kind of name structure to save the images. So, here we will use the following structure in order: the date of the image, the title of the image, the extension of the image. We also replace the colons and spaces with an underscore.
#file name of the image:title = d + "_" + apod["title"].replace(" ","_").replace(":","_") + ".jpg"
Step 6: Downloading the files#
Now that we have enough information to download the files, we download just the image files. Also, if the hd image is not available, we will access an sd image.
Downloading only image files:#POINT A:if apod['media_type'] == 'image':if 'hdurl' in apod.keys():#Downloading the image:urllib.request.urlretrieve(url = apod["hdurl"] , filename = title)else:urllib.request.urlretrieve(url = apod["url"] , filename = title)
Step 7: Email addresses#
Now that we have downloaded the images, it’s time to send that image via email. There are two addresses used here: from_addr and to_addr. You can add more email addresses in to_addr separated by comma.
#POINT B:#Sending email:#Email addresses:from_addr = "sppratik22@gmail.com"to_addr = ["shuklapratik22@gmail.com"]
Step 8: Creating an object#
In the email, we are going to send the text description and the image. Since there are multiple parts in this image, we are creating an instance of class MIMEMultipart(). This allows us to add content in multiple formats.
#POINT C:#create an instance of MIMEMultipart():message = MIMEMultipart()
Step 9: Subject of the email#
Now we are going to send the email with a subject. The subject here will be the file name or title. You can modify it as you would like it.
#POINT D:#Subject of the email:message['Subject'] = apod["title"]
Step 10: Main body of the email#
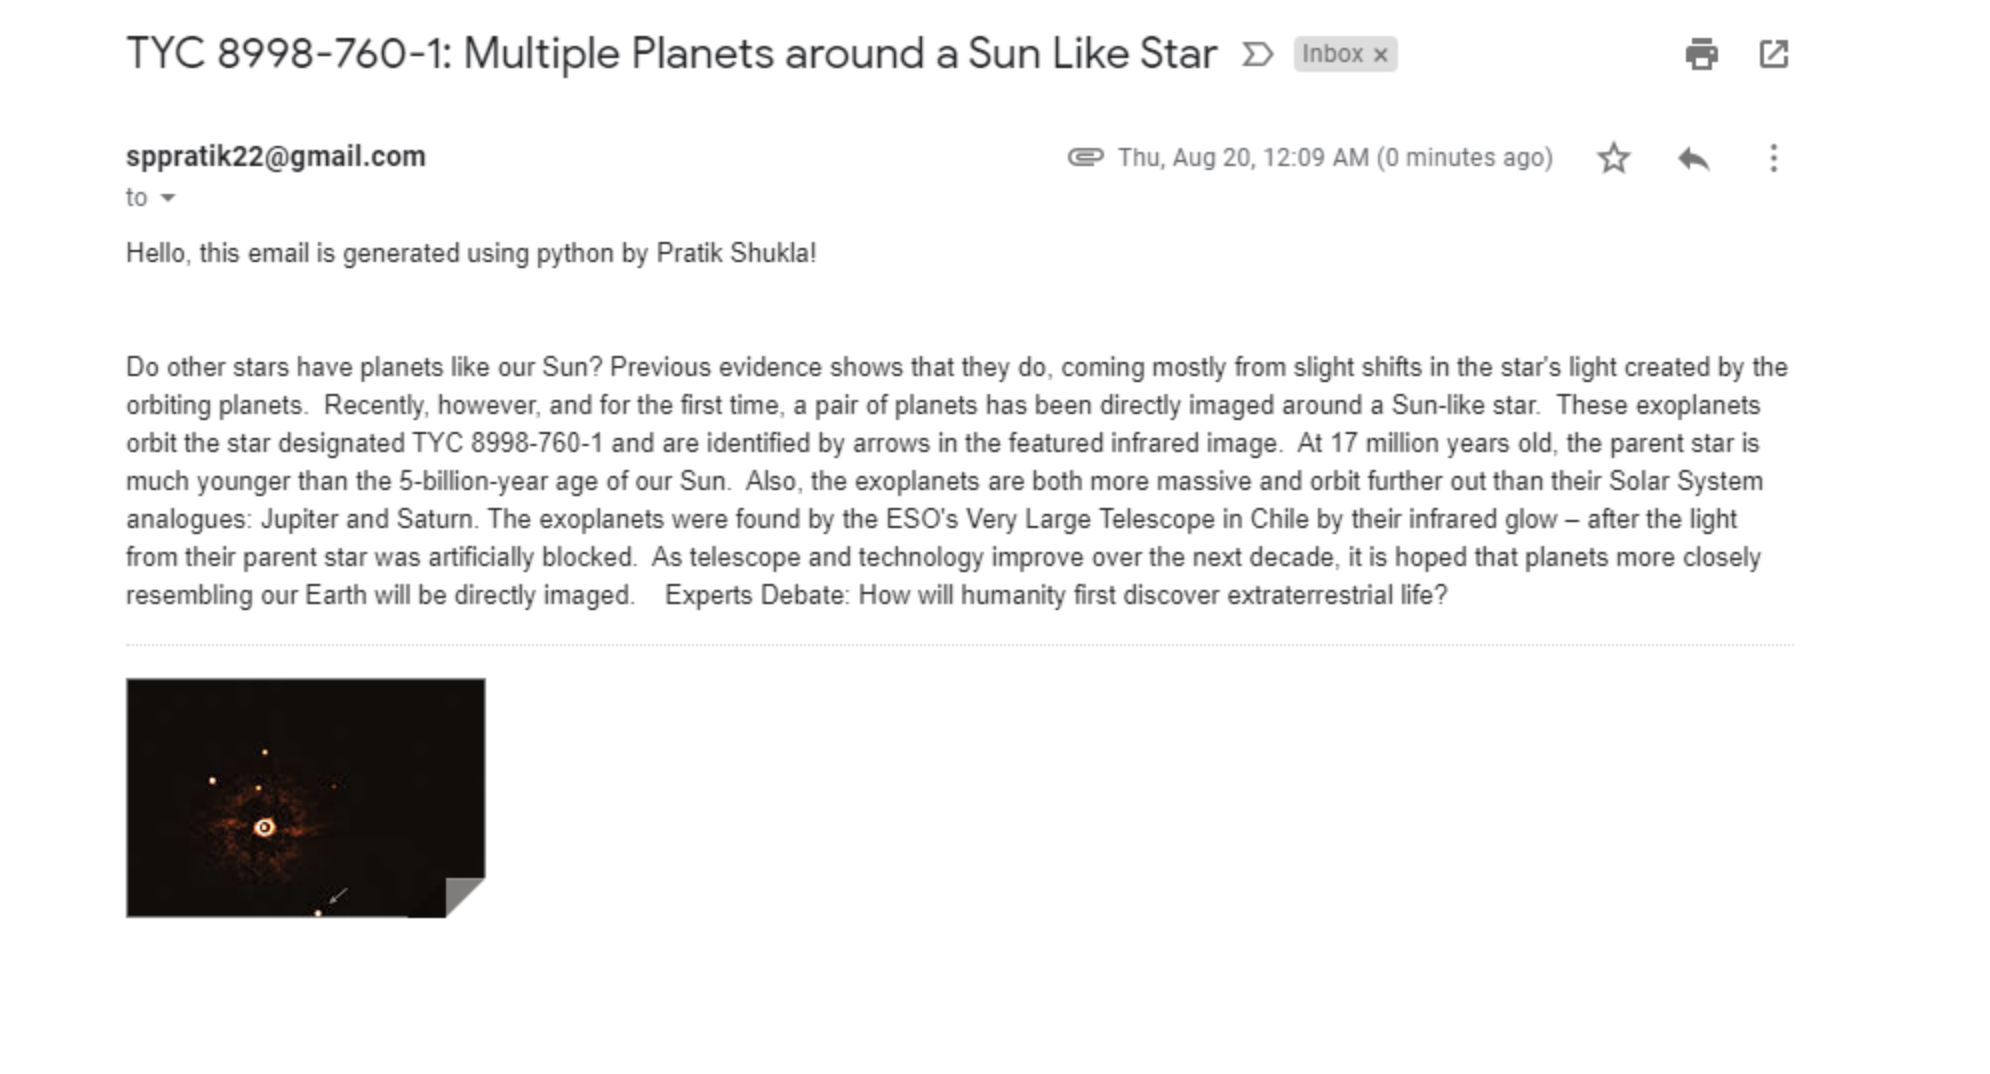
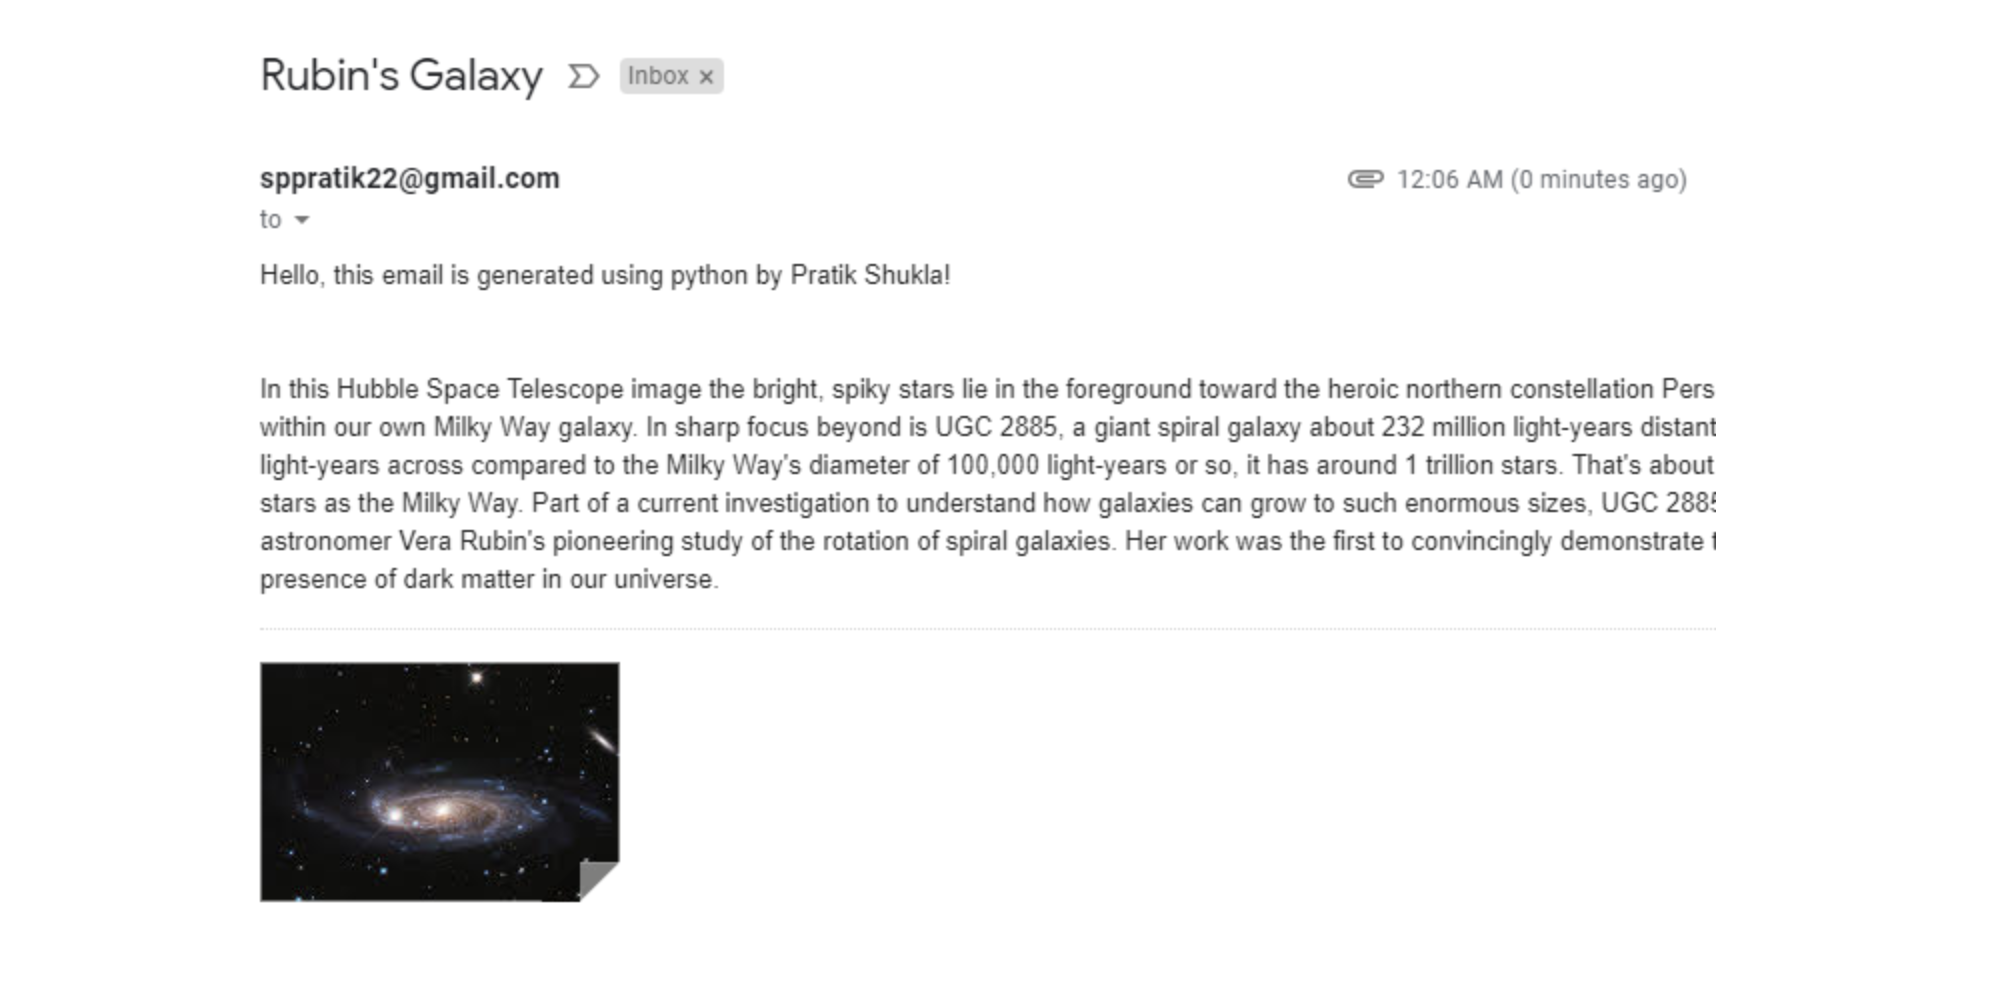
In the body section of our email, we write a simple text followed by the explanation of the attached image. After writing the body, we are going to attach it to the message object using MIMEText. Notice that our text will be in the Plain text format.
#POINT E:#Body of the email:body = "Hello, this email is generated using python by Pratik Shukla!\n\n\n" + apod["explanation"]#Attaching the text in body:message.attach(MIMEText(body, 'plain'))
Step 11: Open the attachment#
Next, we open the file that we want to attach. Here we are going to open the file in binary mode.
#POINT F:#Opening the attachment:filename = title#Opening file in binary mode:attachment = open(filename, "rb")
Step 12: Create object of MIMEBase#
Here we’re creating an object of class MIMEBase called p. A MIME attachment with the content type application/octet-stream is a binary file.
#POINT G:#Creating object of MIMEBase:p = MIMEBase('application', 'octet-stream')
Step 13: Add header with filename#
This determines how we want to display the content. Here we are going to send the image as attachment.
#POINT I:#Adding header with file name:p.add_header('Content-Disposition', 'attachment', filename= title)
Step 14: Attach the file to the message#
Now we are going to attach the file to the main message. Here we are also encoding the attachment.
#POINT J:#Attachment as payload:p.set_payload((attachment).read())#Encoding the payload:encoders.encode_base64(p)#Attaching the payload with message:message.attach(p)
Step 15: Send the email(s)#
Now that we have our content ready, we send the email using the smtp server. Here, I’m using port number 587 and Gmail. We also use the Transport Layer Security (TLS) while sending the email.
Next, we give our email address and password to log in to the gmail account. Next, we convert the whole message to a string. Lastly, we send the email using sendmail() function. After sending the email, we’re going to terminate the session using s.quit().
You should see a message: “Email sent successfully!”
#POINT K:#Create smtp server:s = smtplib.SMTP('smtp.gmail.com', 587)#Start TLS for security:s.starttls()#Credentials authentication:s.login(from_addr, password = "Test_Password#011")# Converts the Multipart msg into a stringtext = message.as_string()# sending the mails.sendmail(from_addr, to_addr, text)# terminating the sessions.quit()print("Email sent successfully!")
Step 16: Image not available#
If the image file is not available to download, no email will send. We will simply print a message that says “Image is not available”.
else:print("Sorry Image not available!")print("Email not sent!")print(apod["url"])
How to send a picture from an input date#
Now if we want to send an image for a specific date, we just have to get the date from the user. The rest of the steps are exactly the same.
#Import required libraries:import nasapyfrom datetime import datetimeimport urllib.requestimport smtplibfrom email.mime.multipart import MIMEMultipartfrom email.mime.text import MIMETextfrom email.mime.base import MIMEBasefrom email import encoders#Initialize Nasa class by creating an object:nasa = nasapy.Nasa(key="523p5hPYHGzafYGLCkqa54kKMTV2vbP0XcPxkcLm")#Get today's date in YYYY-MM-DD format:d = input("Enter date in YYYY-MM-DD format : ")#Get the image information:apod = nasa.picture_of_the_day(date=d, hd=True)#file name of the image:title = d+"_"+apod["title"].replace(" ","_").replace(":","_")+".jpg"#Downloading file only if it's image:if apod['media_type'] == 'image':#Downloading the image:if 'hdurl' in apod.keys():urllib.request.urlretrieve(url = apod["hdurl"] , filename = title)else:urllib.request.urlretrieve(url = apod["url"] , filename = title)#Sending email:#Email addresses:from_addr = "sppratik22@gmail.com"to_addr = ["shuklapratik22@gmail.com"]#create an instance of MIMEMultipart():message = MIMEMultipart()#Subject of the email:message['Subject'] = apod["title"]#Body of the email:body = "Hello, This is an automatic email by Pratik Shukla.\n\n\n" + apod["explanation"]#Attaching the text in body:message.attach(MIMEText(body, 'plain'))#Opening the attachment:filename = title#Opening file in binary mode:attachment = open(filename, "rb")#Creating object of MIMEBase:p = MIMEBase('application', 'octet-stream')#Adding header with file name:p.add_header('Content-Disposition', 'attachment', filename= title)#Attachment as payload:p.set_payload((attachment).read())#Encoding the payload:encoders.encode_base64(p)#Attaching the payload with message:message.attach(p)#Create smtp server:s = smtplib.SMTP('smtp.gmail.com', 587)#Start TLS for securitys.starttls()#Credentials authentications.login(from_addr, password = "Test_Password#011")#Converts the Multipart msg into a stringtext = message.as_string()#Sending the mails.sendmail(from_addr, to_addr, text)#Terminating the sessions.quit()print("Email sent successfully!")#If media file is not image:else:print("Image not available!")print("Email not sent!")print("Please enter some other date!!")
How to send a random astronomy picture#
In the last tutorial, we use the date_range() function to send 5 images. Now, we will pick a random image from those downloaded images and send it via email.
Now here we are going to modify the code a bit. Instead of sending the explanation of the image, we are going to send a random astronomy quote from a csv file.
Note that the majority of the code remains the same as the previous tutorial. So here we’ll only discuss the code parts that vary from the previous code.
Step 1: Import libraries#
#Import required libraries:import nasapyimport randomimport osimport pandas as pdfrom datetime import datetimeimport urllib.requestimport smtplibfrom email.mime.multipart import MIMEMultipartfrom email.mime.text import MIMETextfrom email.mime.base import MIMEBasefrom email import encoders
os: To get the files from a specific directory.pandas: To read the csv file.random: To randomly select the image and quote.
Step 2: Selecting the astronomy quote#
We are going to read the csv file in a variable called data. Data has all the quotes with their index numbers. Now we are going to select a number randomly between 1 and len(data).
Now we’ll find the quote at that index value. This gives us a variable for the quote. Remember that we are going to use this quote in the body section of the email.
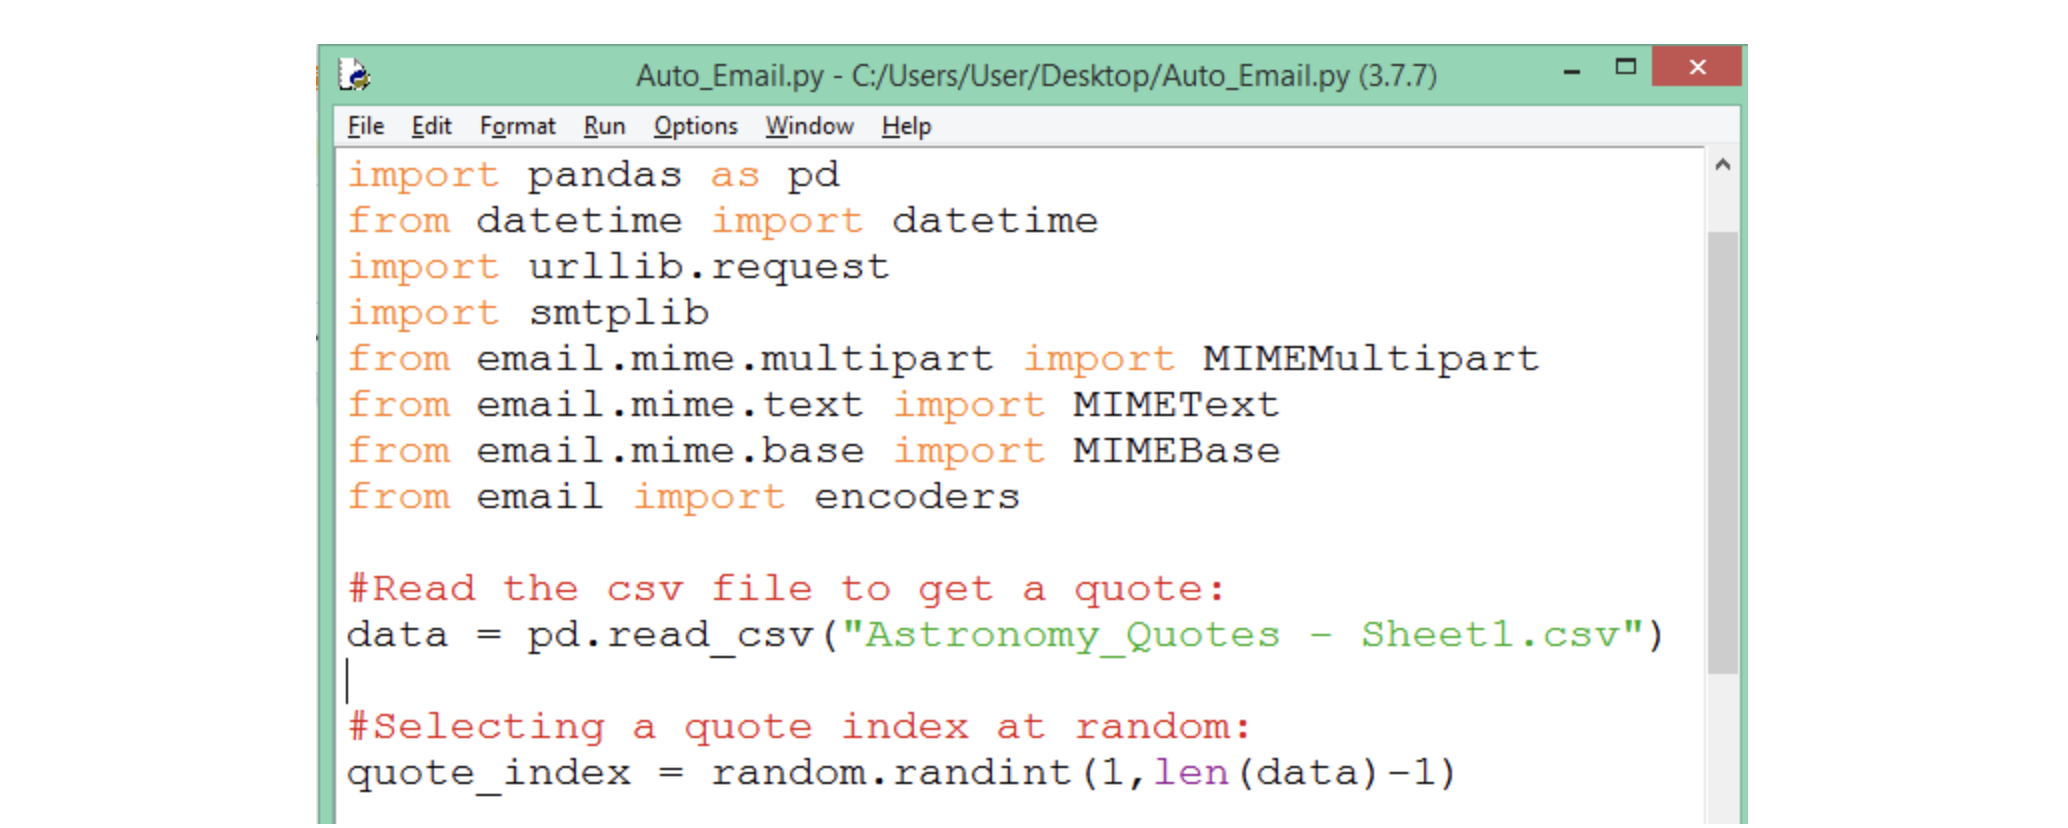
#Read the csv file to get a quote:data = pd.read_csv("Astronomy_Quotes - Sheet1.csv")#Selecting a quote index at random:quote_index = random.randint(1,len(data)-1)#Selecting a quote based on quote index:Quote = data["Quote"][quote_index]
Step 3: Getting the image location#
Our images are stored in the AAA_Images_1 folder. We get all the files available there in a list called astro_images. We can access the images like list elements.
#Image Directory:image_dir = "AAA_Images_1"#List of images in directory:astro_images = os.listdir(image_dir)
Step 4: Select random image#
Now we are going to select an image randomly. The astro_images variable has a list of all the images, so we are going to randomly select image from the list of images available. We’ll use the title/file name as subject of the email later in this tutorial.
#Random number to select an image:n = random.randint(0,len(astro_images)-1)#File name of the image:title = astro_images[n]print(title)
Step 5: Sending the email#
Here we’re going to make a few variations to our previous code.
a) In the body, we attach the random quote instead of explanation of the image.
b) We look into the directory to find the image for attachment.
Take a look at the complete code below!
#Import required libraries:import nasapyimport randomimport osimport pandas as pdfrom datetime import datetimeimport urllib.requestimport smtplibfrom email.mime.multipart import MIMEMultipartfrom email.mime.text import MIMETextfrom email.mime.base import MIMEBasefrom email import encoders#Read the csv file to get a quote:data = pd.read_csv("Astronomy_Quotes - Sheet1.csv")#Selecting a quote index at random:quote_index = random.randint(1,len(data)-1)#Selecting a quote based on quote index:Quote = data["Quote"][quote_index]#Image Directory"image_dir = "AAA_Images_1"#List of images in directory:astro_images = os.listdir(image_dir)#Random number to select an image:n = random.randint(0,len(astro_images)-1)#File name of the image:title = astro_images[n]print(title)#Email addresses:from_addr = 'sppratik22@gmail.com'to_addr = ['shuklapratik22@gmail.com']#Creating an object of MIMEMultipart():message = MIMEMultipart()#Subject of the email:message['Subject'] = title#Body of the email:body = "Hello, This is an automatic email generated using python by Pratik Shukla.\n\n" +"Here's an astronomy quote for you:\n\n" + Quote#Attaching the text in body:message.attach(MIMEText(body, 'plain'))#Opening the attachment:filename = os.path.join(image_dir,astro_images[n])#Opening file in binary mode:attachment = open(filename, "rb")#Creating object of MIMEBase:p = MIMEBase('application', 'octet-stream')#Adding header with file name:p.add_header('Content-Disposition', 'attachment', filename= title)#Attachment as payload:p.set_payload((attachment).read())#Encoding the payload:encoders.encode_base64(p)#Attaching the payload with message:message.attach(p)#Create smtp server:s = smtplib.SMTP('smtp.gmail.com', 587)#Start TLS for security:s.starttls()#Credential authentication:s.login(from_addr, password = "Test_Password#011")#Converts the Multipart msg into a string:text = message.as_string()#Sending the mails.sendmail(from_addr,to_addr, text)#Terminating the sessions.quit()print("Email sent successfully!")
How to send astronomy images automatically#
Above learned how to send images by email using Python scripts. But what if we can automate that process? Let’s see how to automate those scripts using a task scheduler in Python.
To accomplish this, you won’t need any extra download any software. We’ll use the built-in task scheduler provided by the Windows operating system.
We’re going to use the last part of our previous tutorial to send the email. But this time, our code script will run on it’s own!
Step 1: Prepare a Python script#
To run the code, we need to have the python script in .py format. If you’re using a jupyter notebook, you can easily download it from the File section.
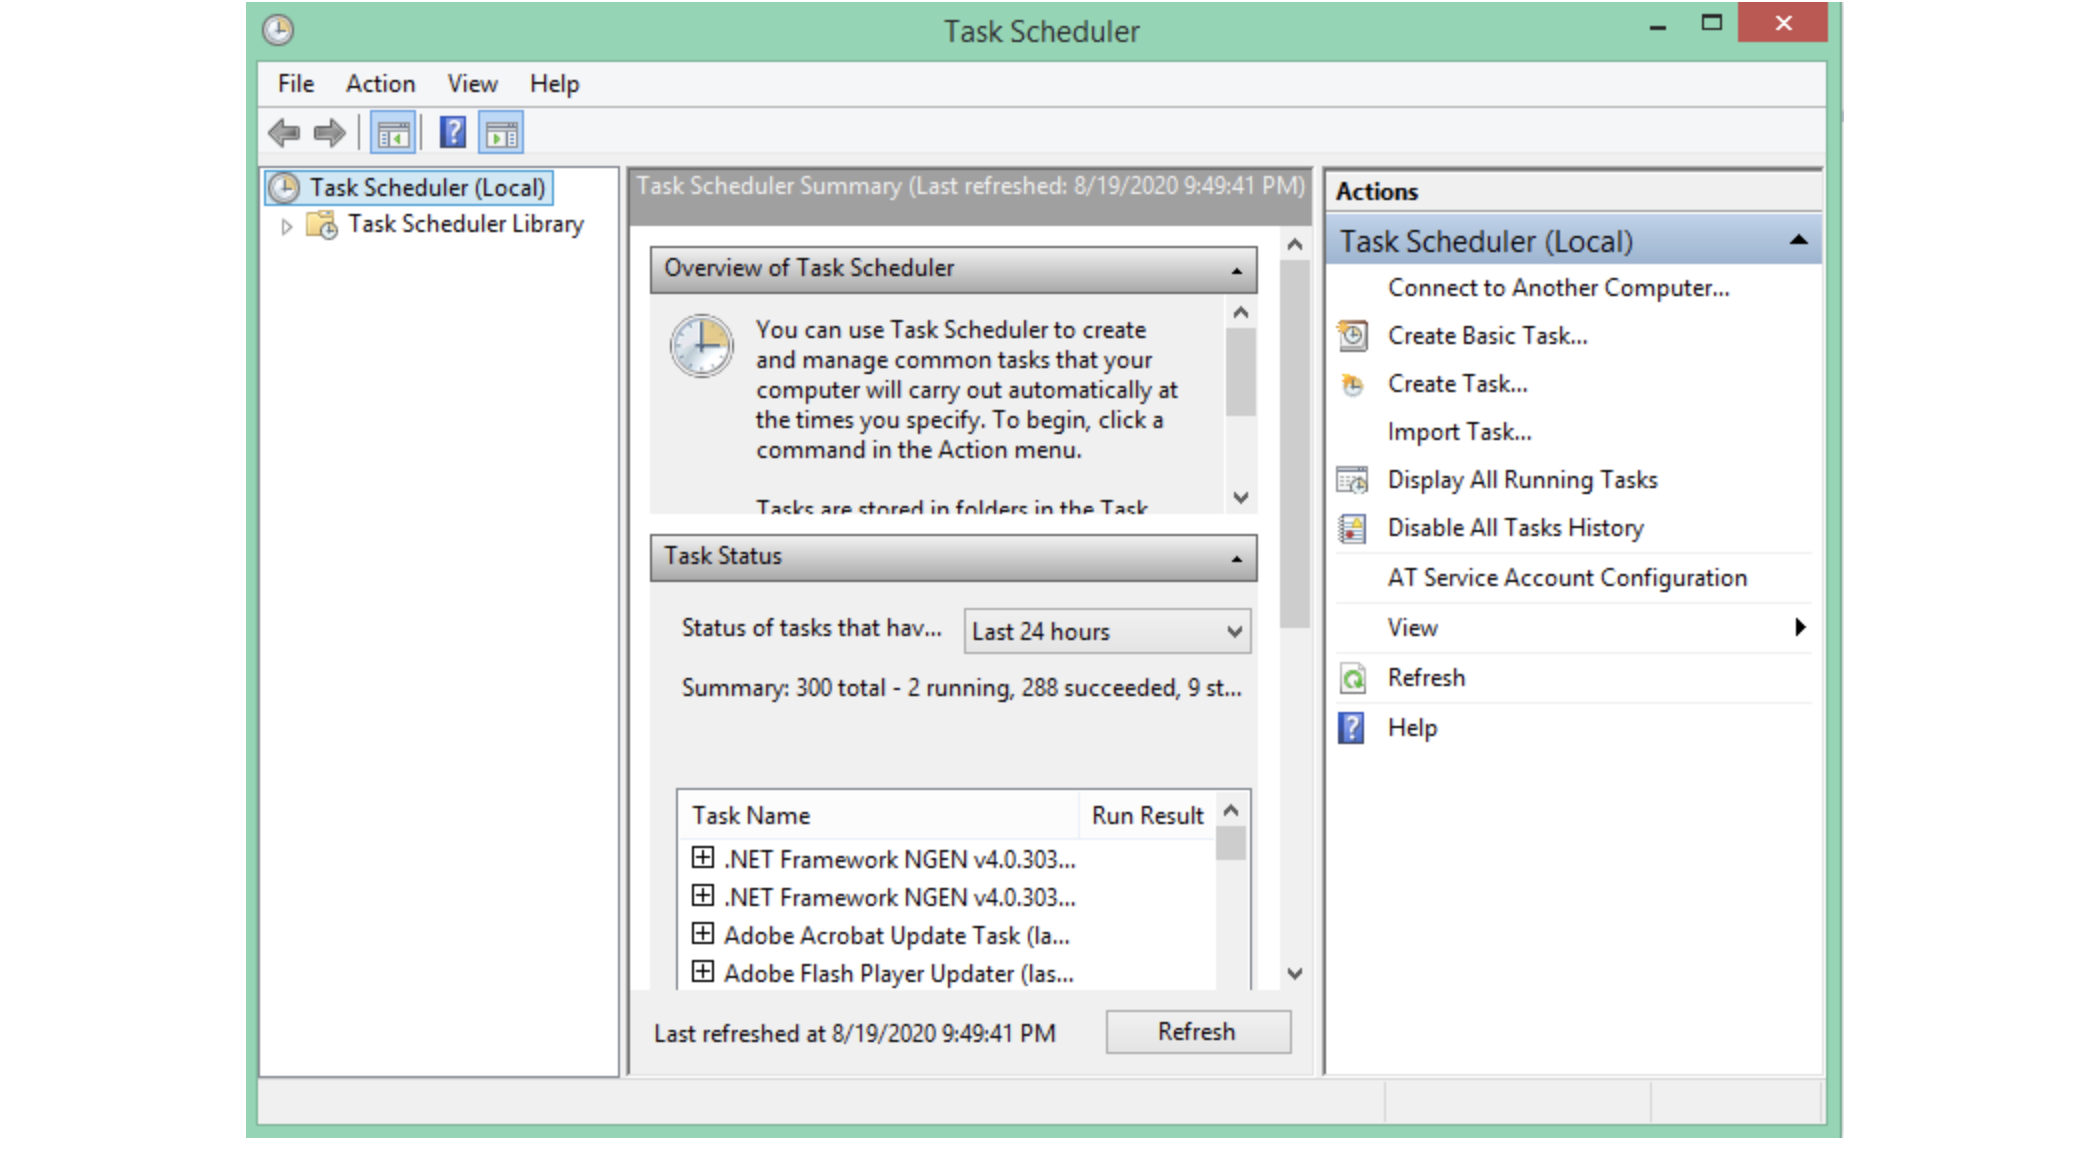
Step 2: Opening the task scheduler#
Go to the task scheduler. byfollowing these steps:
Control Panel ⇒ Administrative Tools ⇒ Task Scheduler
When you double click on the task scheduler icon, you’ll see the following screen.
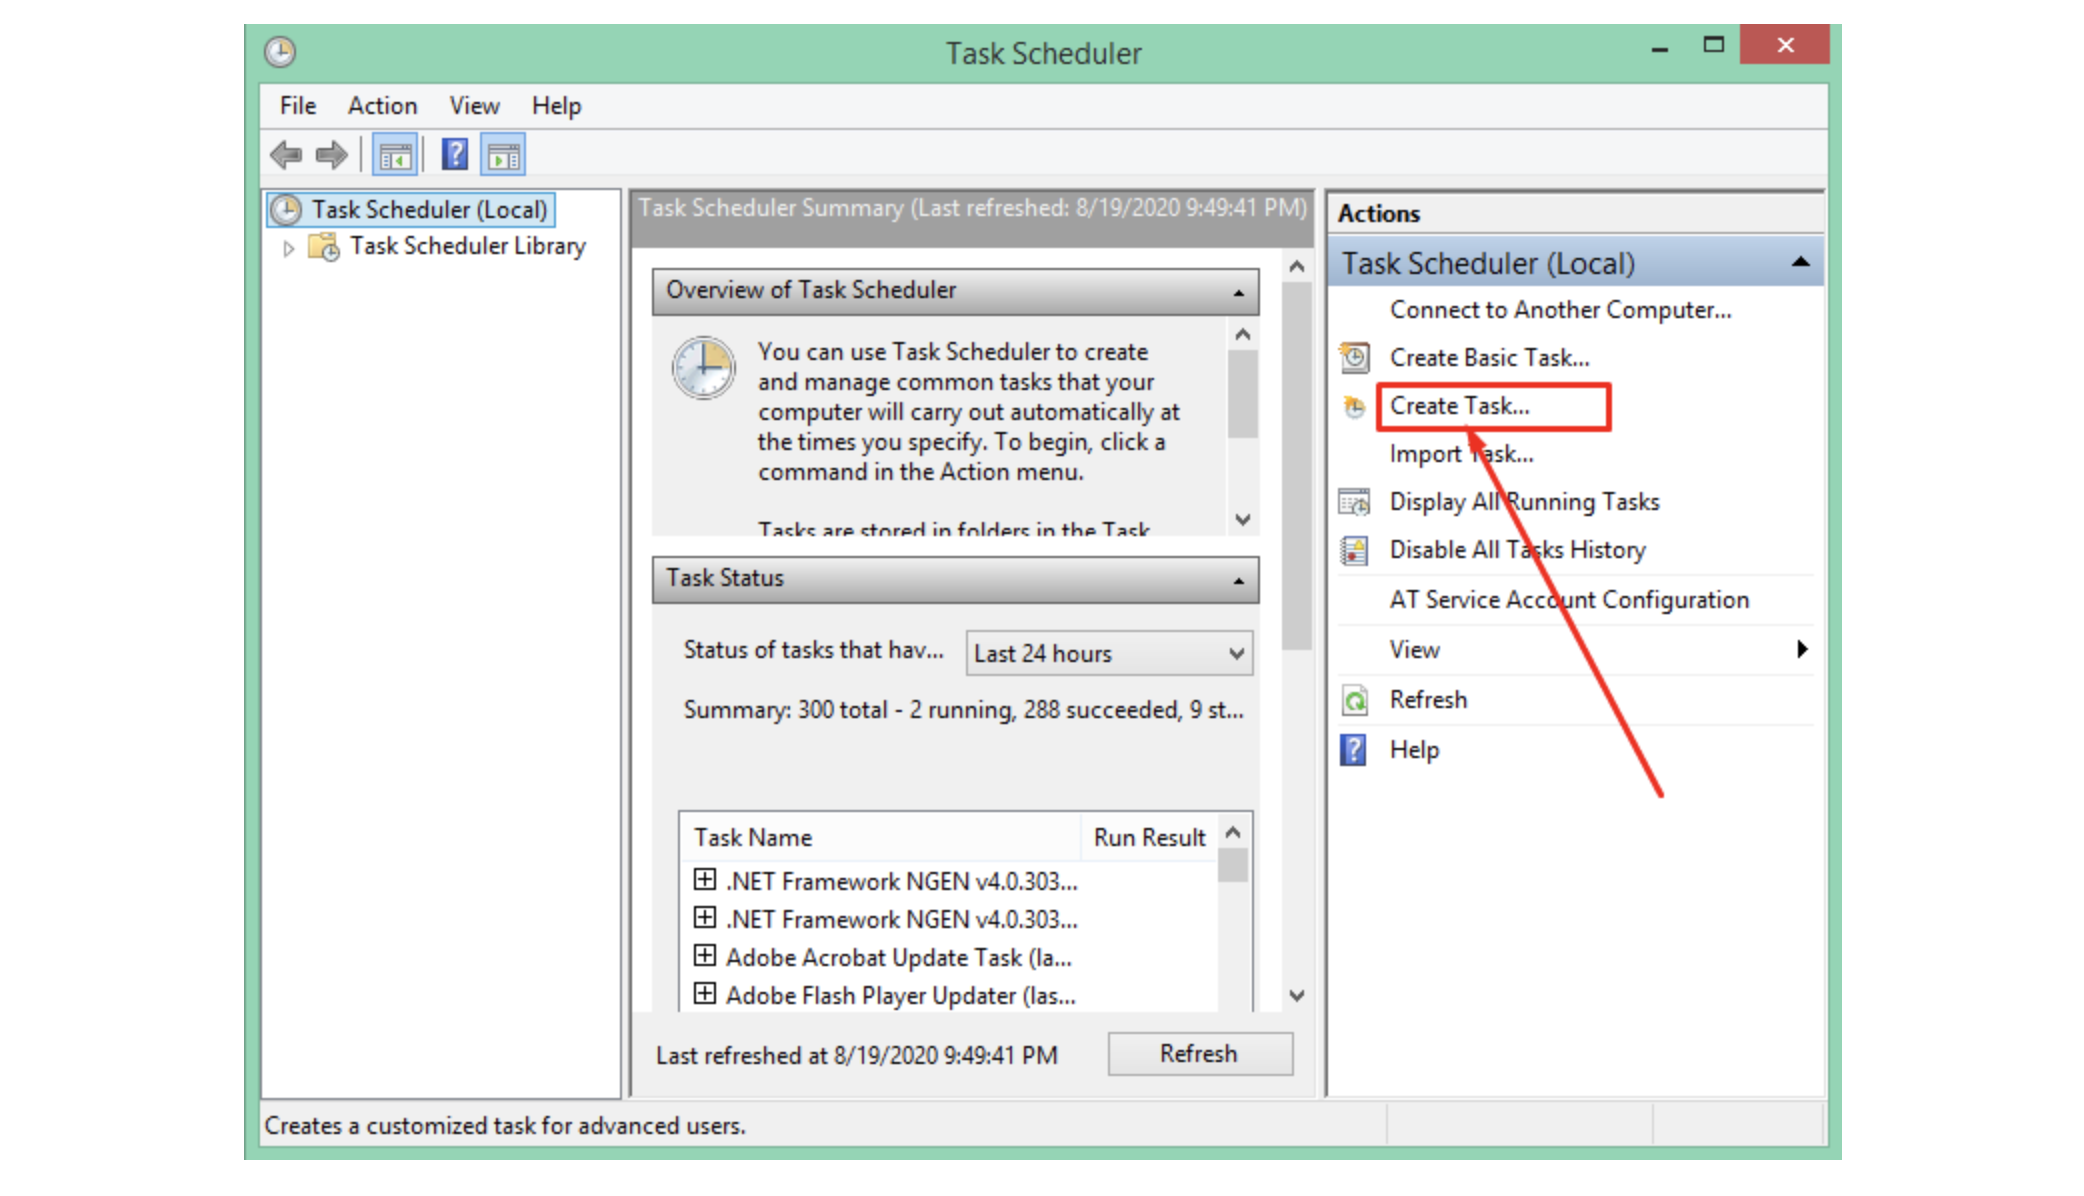
Step 3: Creating a task#
Now we’ll create a task. To create a new task click on the “Create Task” option as shown below.
Now when you click on the “Create Task” option, a window will open requesting more details. First, you have to assign a name value for your task. We can write anything we want here. After that we can also add some description for our task. This is useful when we have to schedule many tasks. After that, click on the “OK” button.
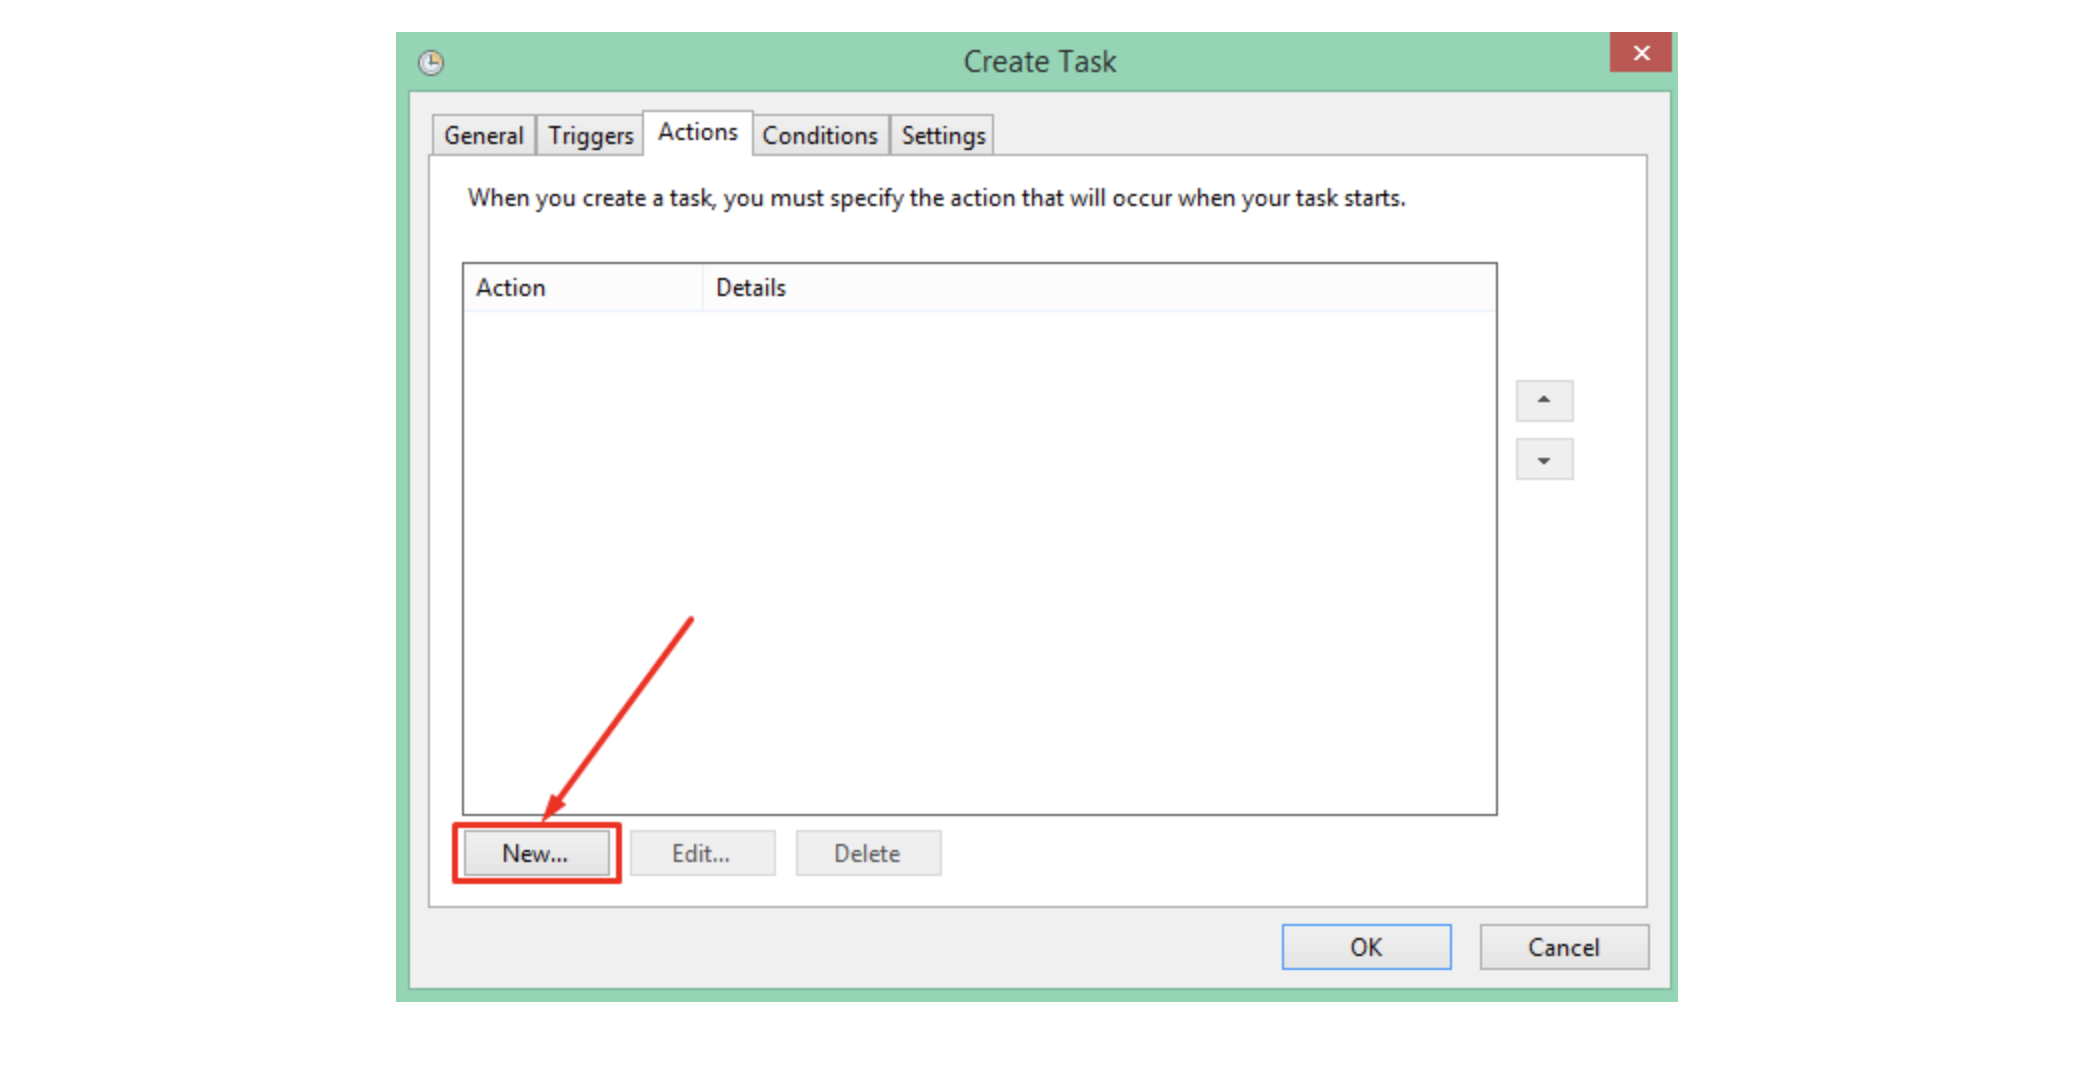
Step 4: Actions tab#
Now go to the “Actions” tab. We click on the “New” button to create a new action. Action basically defines the task that we want to schedule.
After clicking on the New button, a window will open. Here in the Program/Script text box we have to add the full path where our python.exe file is located. Then we’ll add the filename that we want to run(.py). Next, we’ll add the path that leads to the python file.
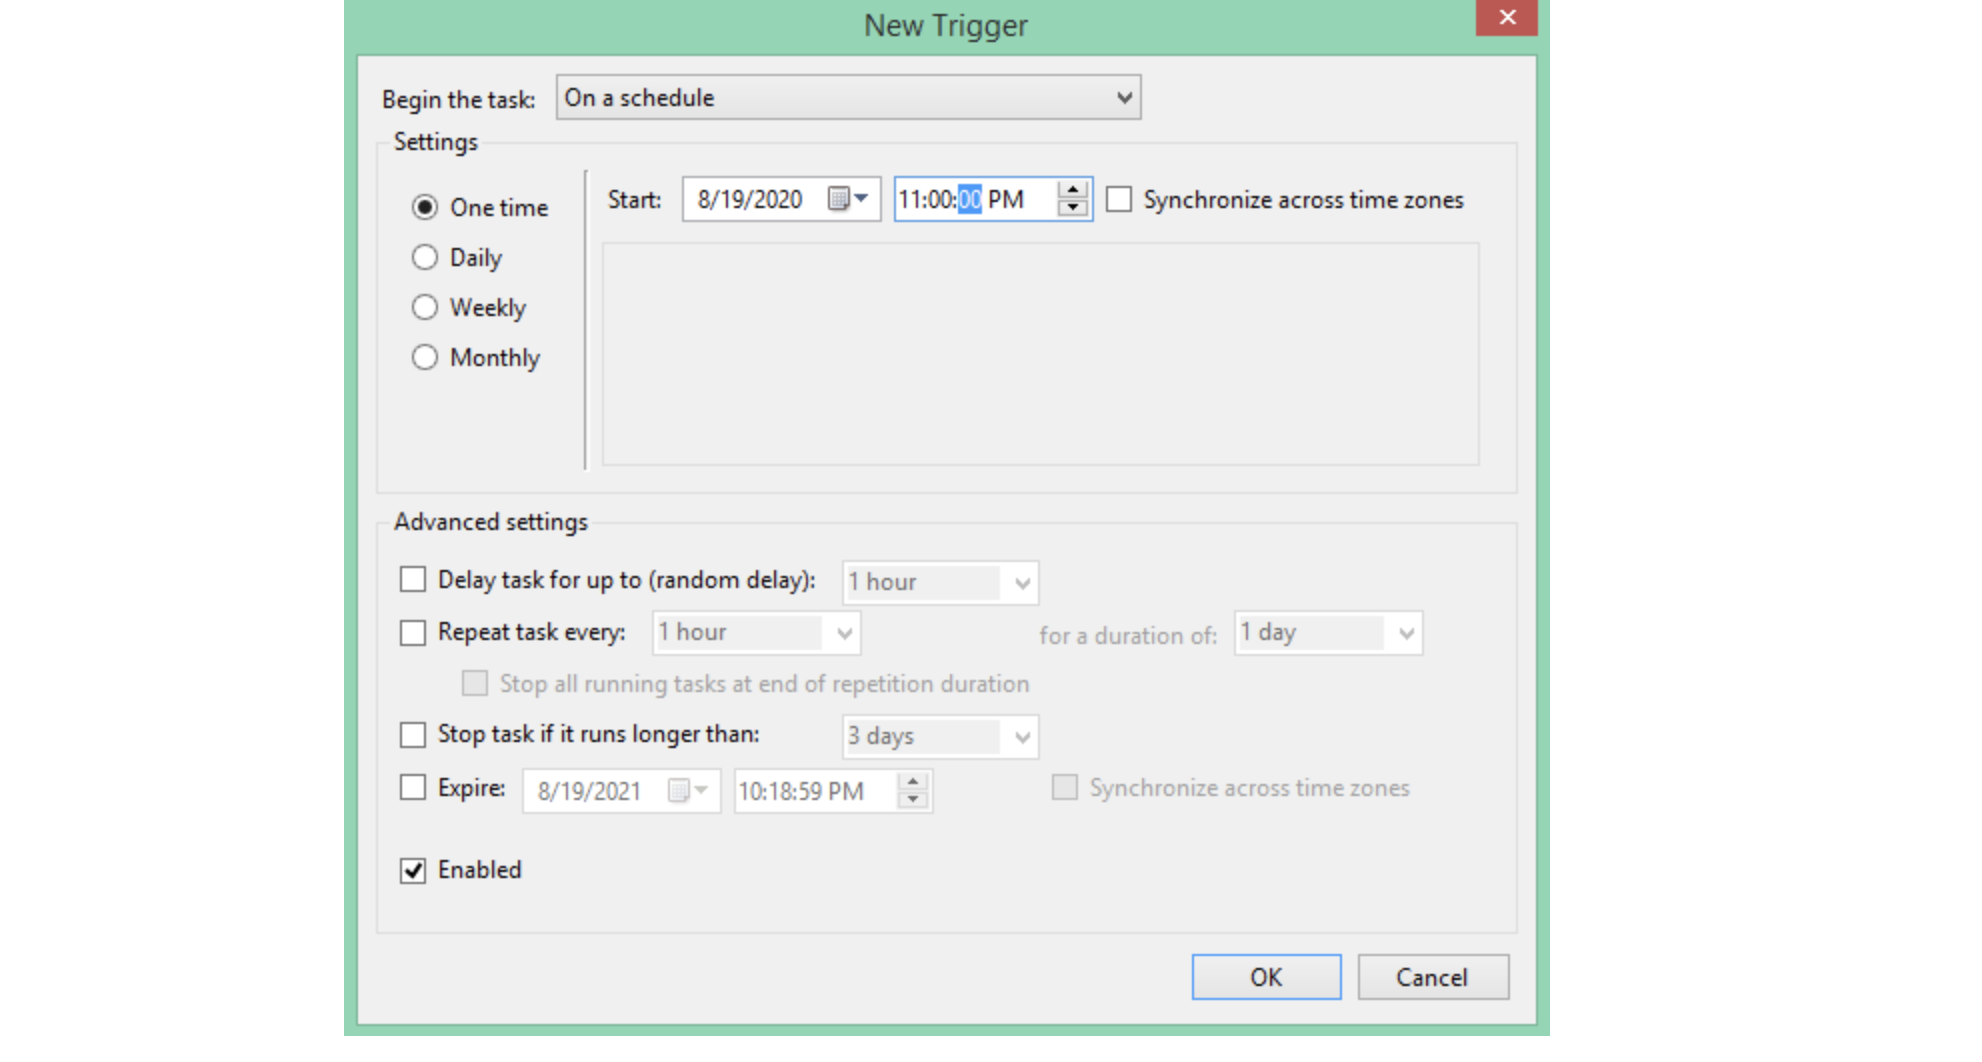
Step 5: Setting time for action#
Then go to the Triggers tab. Here we have to mention that the action we just created will be triggered at what time. Specify the time and date at which we want to trigger our action.
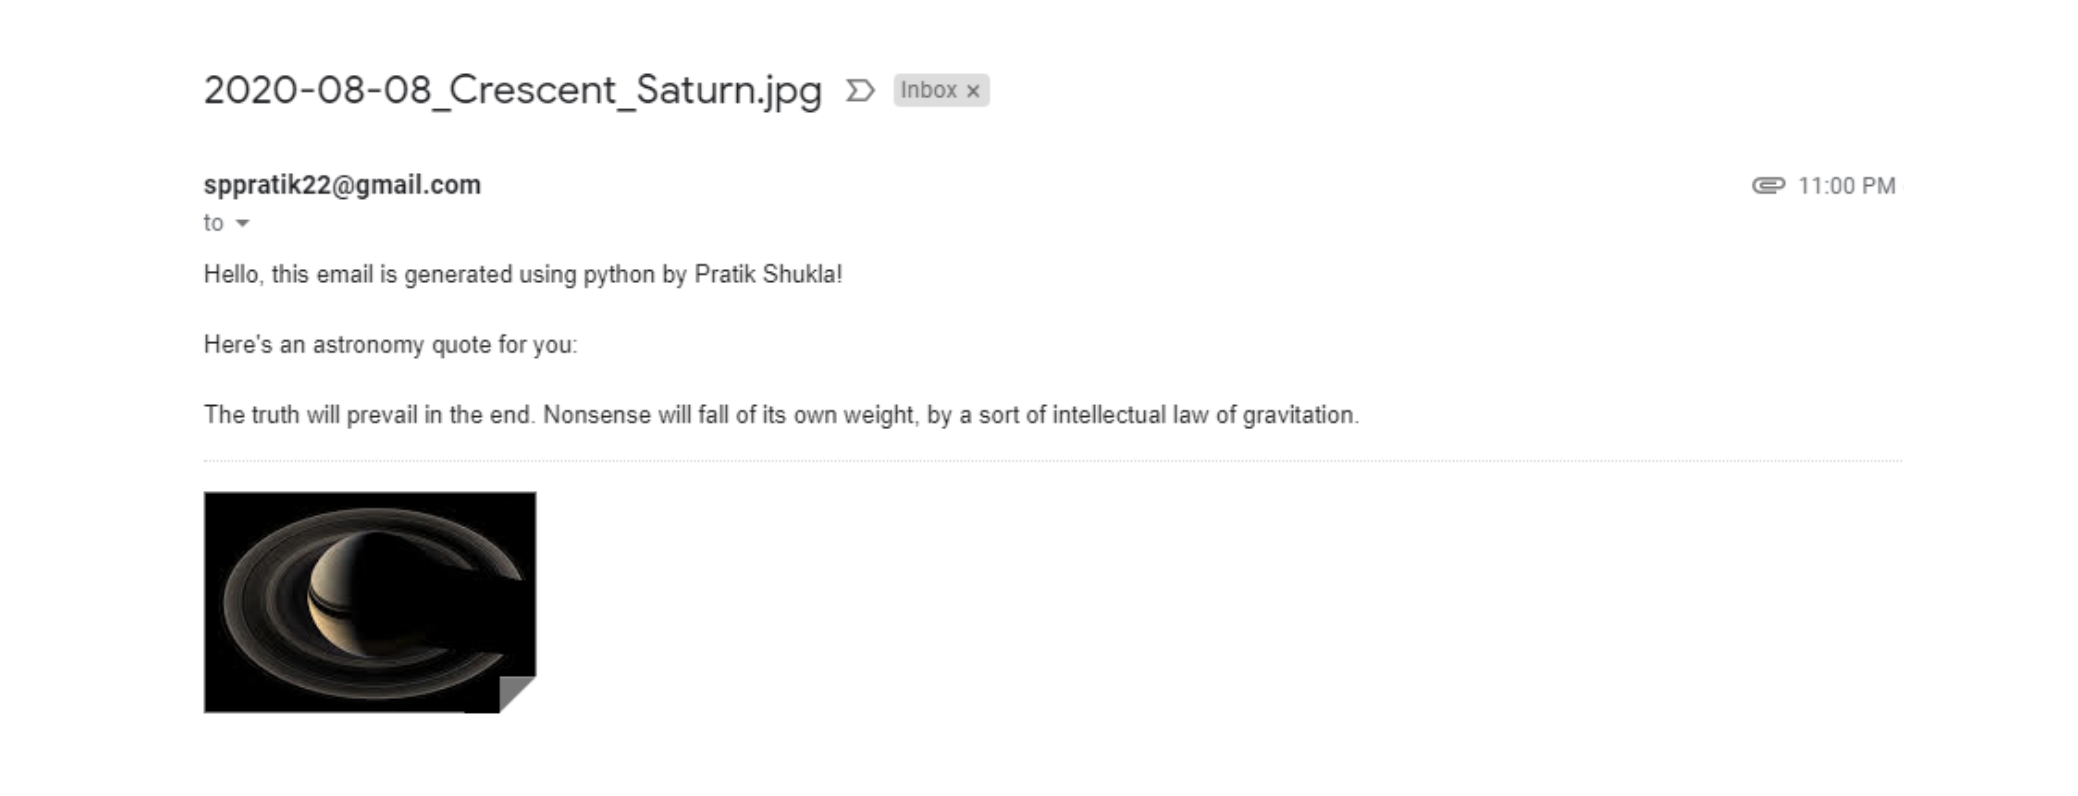
Output of the process#
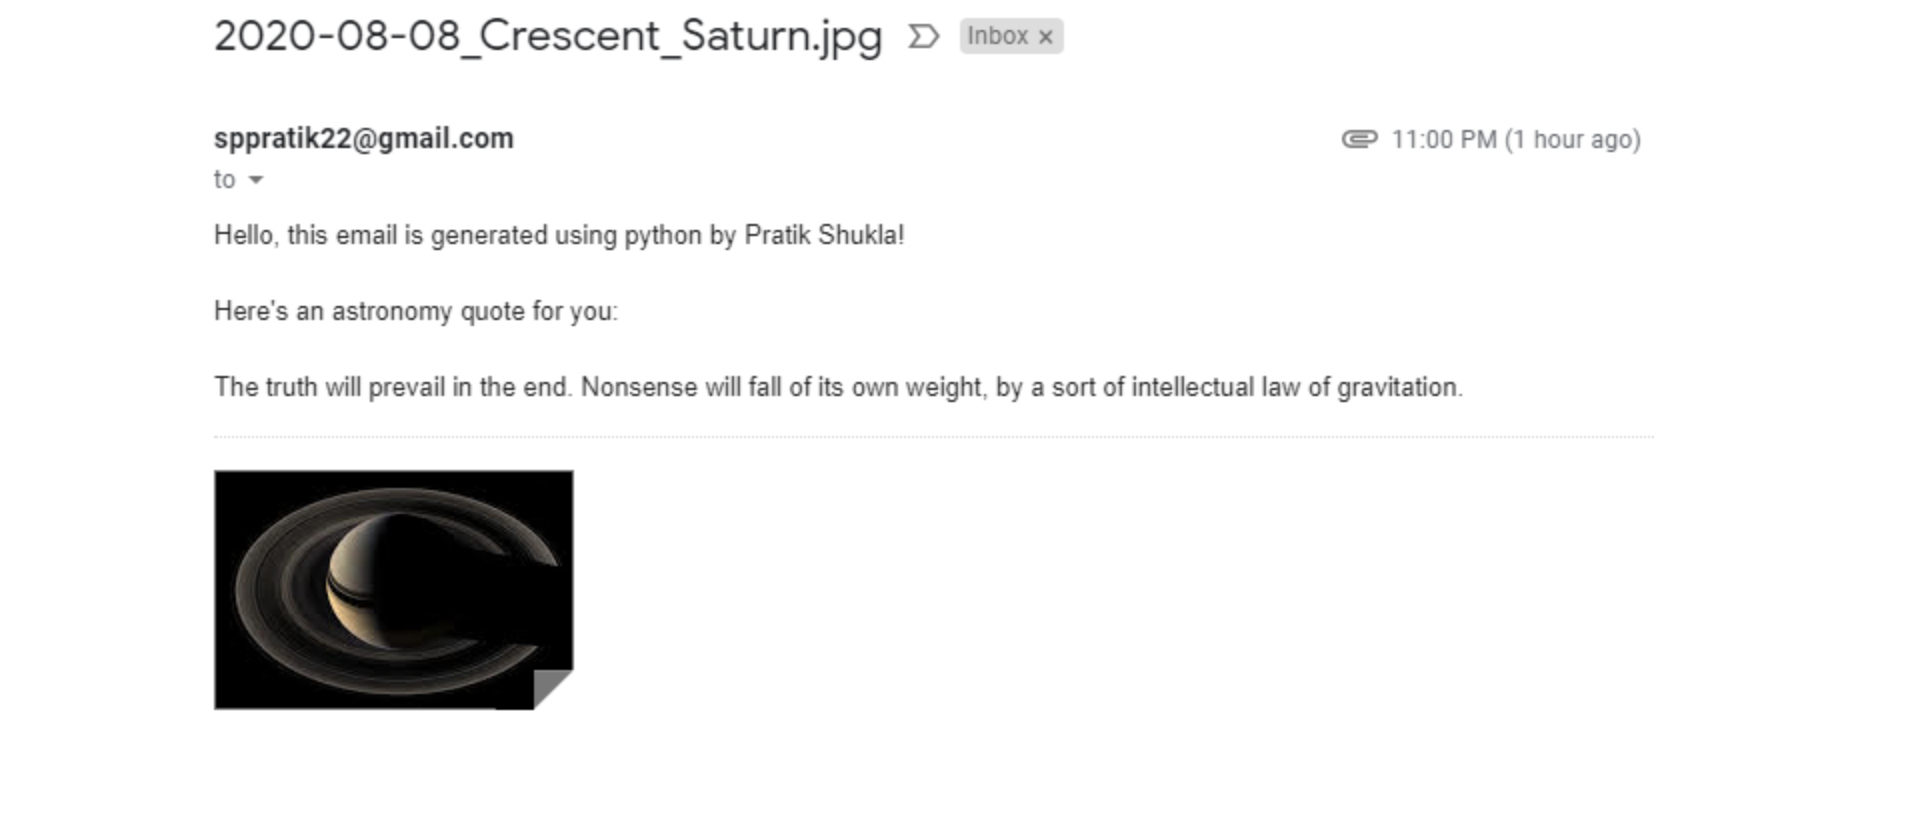
When it’s time our file will execute and if it requires any input from the user, you have to feed it with that input.
Notice that our task scheduler executed the program at 11:00 PM and we got the mail at the same time.
You can download all the executable python files here.
Wrapping up#
Congratulations of completing this fun activity with NASA, Task Schedulers, and Python. I hope this activity taught you some new things you can do with Python and inspired you to keep learning.
If you have any doubts, questions, or thoughts regarding this article, feel free to contact me at shuklapratik22@gmail.com
If you want to continue learning abut APIs and want to take these skills to the next level, check out Educative’s course Learn REST and SOAP API Test Automation in Java. You will learn how to perform REST and SOAP API test automation and learn how to write APIs and integration tests from scratch.
Happy learning!
Continue reading about Python and APIs#
Frequently Asked Questions
What is Python scripting for automation?
Written By:
Pratik Shukla
Join 2.5 million developers at
Explore the catalog
Free Resources
TRENDING TOPICS
